
Bob Lin Photography services
Real Estate Photography services
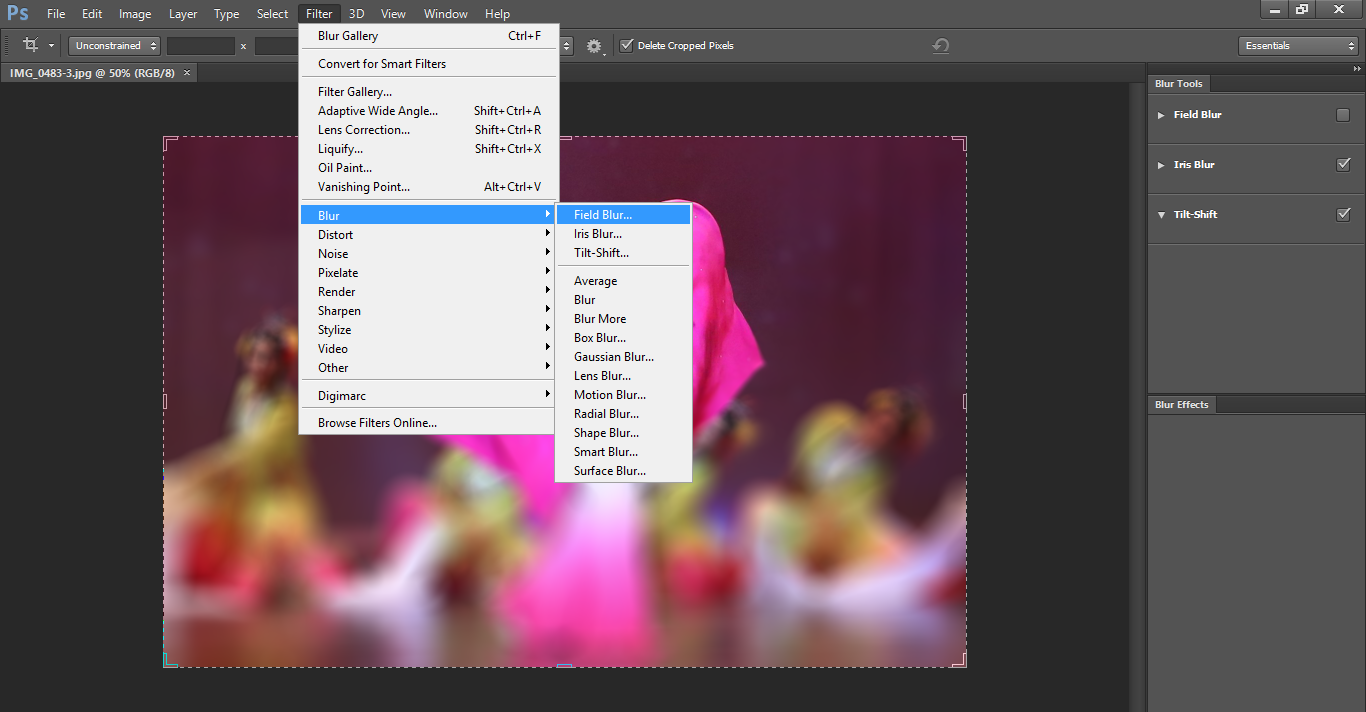
1. With the photo open, go to Filter>Blur.
2. You will have these options:
There are three brand new blur filters in Photoshop CS6: Field Blur, Iris Blur and Tilt-Shift. Each of these filters gives us a different way to add a blur effect to a photo, but as we'll see in these tutorials, Field Blur, Iris Blur and Tilt-Shift have one big advantage in common - they give us amazing control over the effect because they don't simply apply uniform blurring across the entire image. Instead, they allow us to easily adjust and fine-tune the blur amount in specific areas, and they do it without the need for layer masks!
Field Blur filter, which is handy when you need the most flexibility and control in blurring specific areas of an image while keeping other (more important) areas in sharp focus.
Iris Blur enables you to achieve what the Field Blur does (add depth of field to flat images), but with more control.
Tilt-shift photography is a way of giving subjects of a photo a miniature look. That’s achieved by selectively focusing and defocusing parts of the image through manual tilting and shifting the camera lens, creating a shallow depth of field that’s similar to macro photography.
And Average, Blur, Blur More, Box Blur, Gaussian Blur, Lens Blur, Motion Blur, Radial Blur, Shape Blur, Smart Blur, Surface Blur.
For consulting service, Contact Us
|
|
Bob Lin Photography services
Real Estate Photography services
