Photoshop CC new version comes with dehaze feature. You can refer to this post: How to use Dehaze in Photoshop
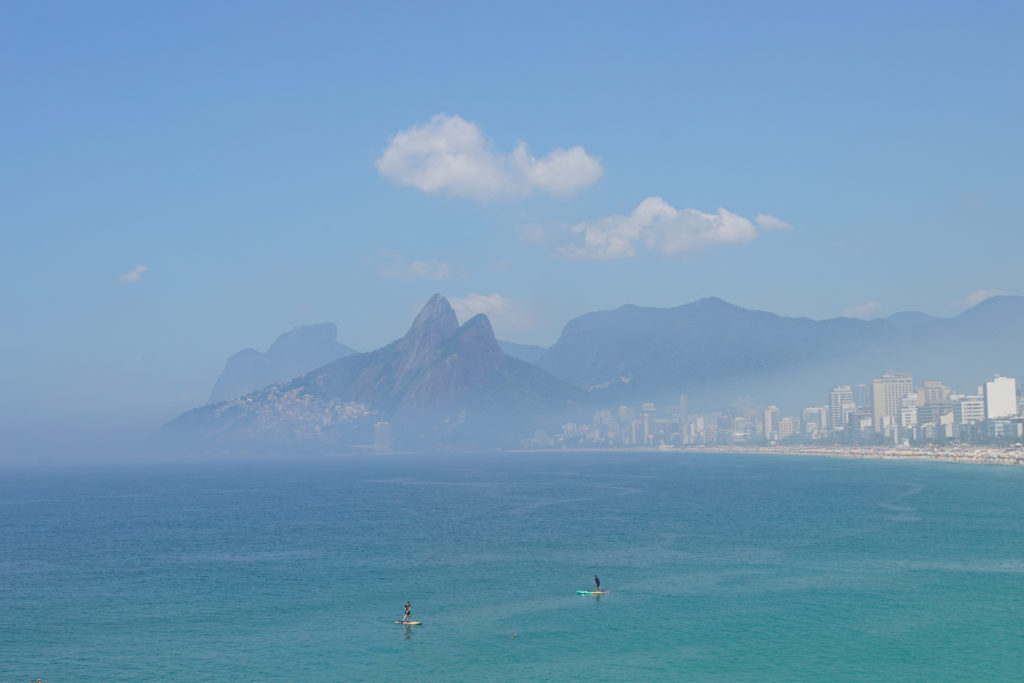
This is before
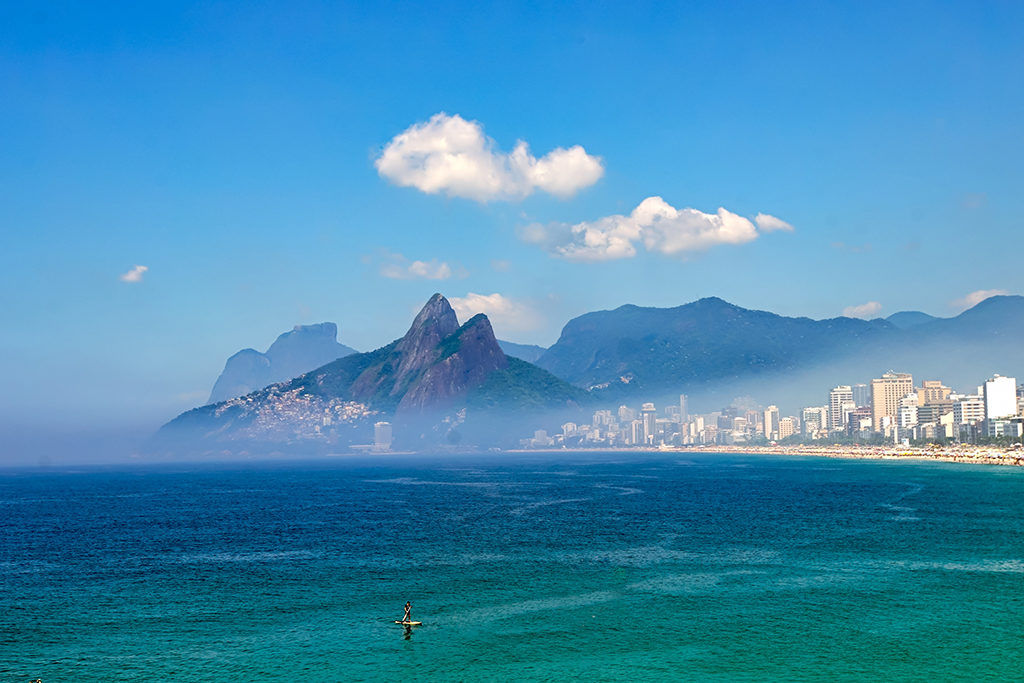
This is after
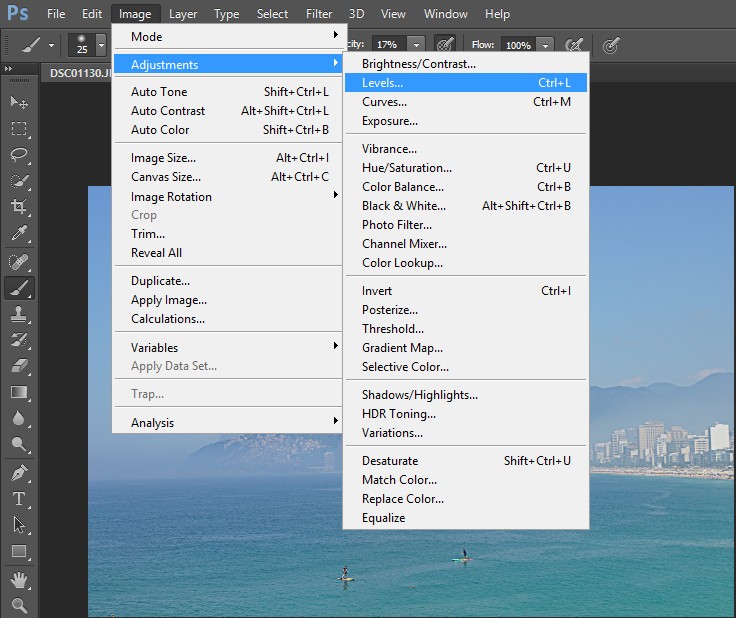
If you use old Photoshop or you want to control defog manually, you may have many other options.
- Exposure levels correction. To do that, go to Image>Adjustment>Levels.
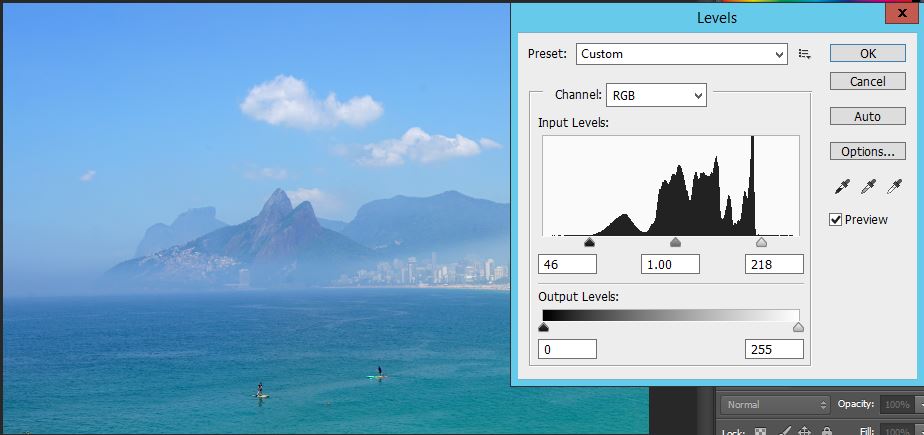
In the histogram, move the left slider in towards the end of the histogram until the object becomes more visible. You can do the same with the right slider.
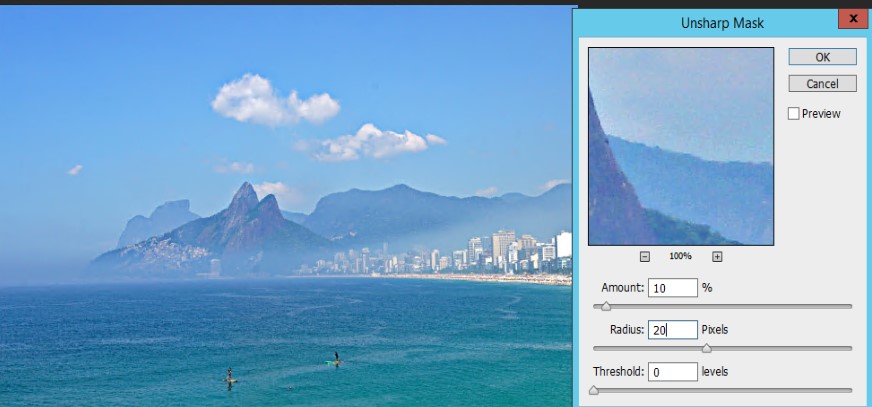
2. Unsharp mask. To do that, go to Filter>Sharpen>Unsharp Mask.
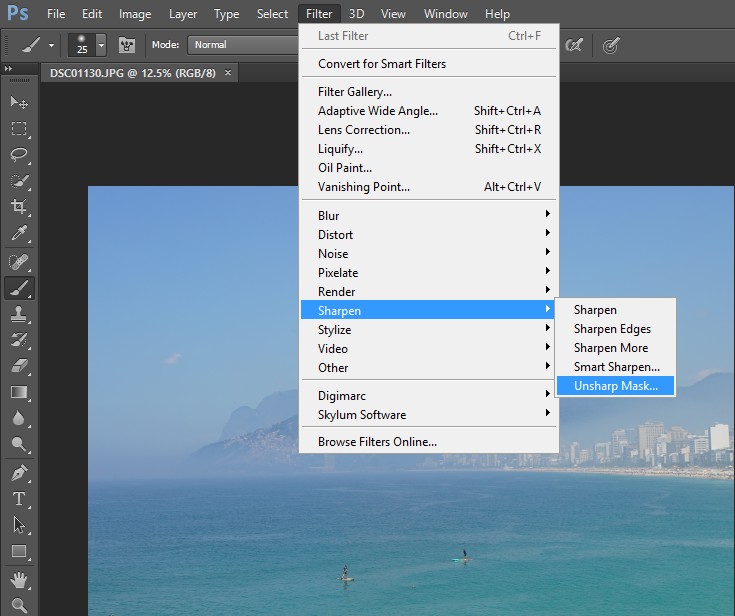
You may try a couple times starting Amount 10% and Radius 20 Pixel; then Amount 20% and Radius 40 Pixel; finally 20% and 80 Pixel.
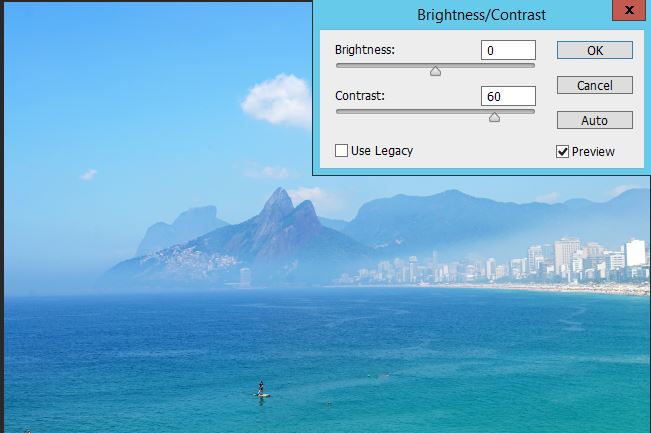
3. Contrast. To do that, go to Image>Adjustments>Brightness/Contrast. Adjust the Contrast, for example 60.
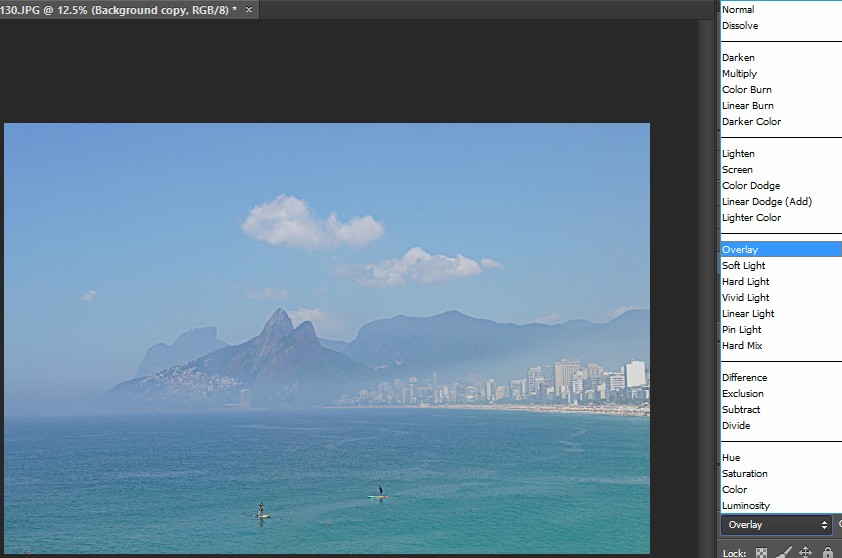
4. Some people say we can try High Pass and Overlay. To do that, go to Filter>Other>High Pass.
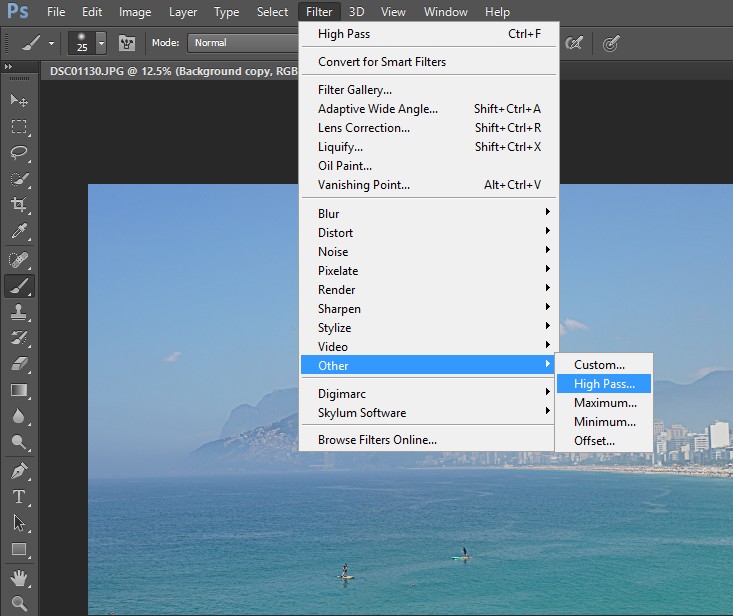
In Layers, change Blending Mode from Normal to Overlay.