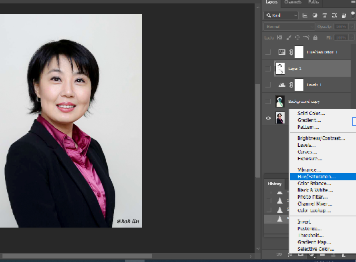
- With the photo open, duplicate the layer.
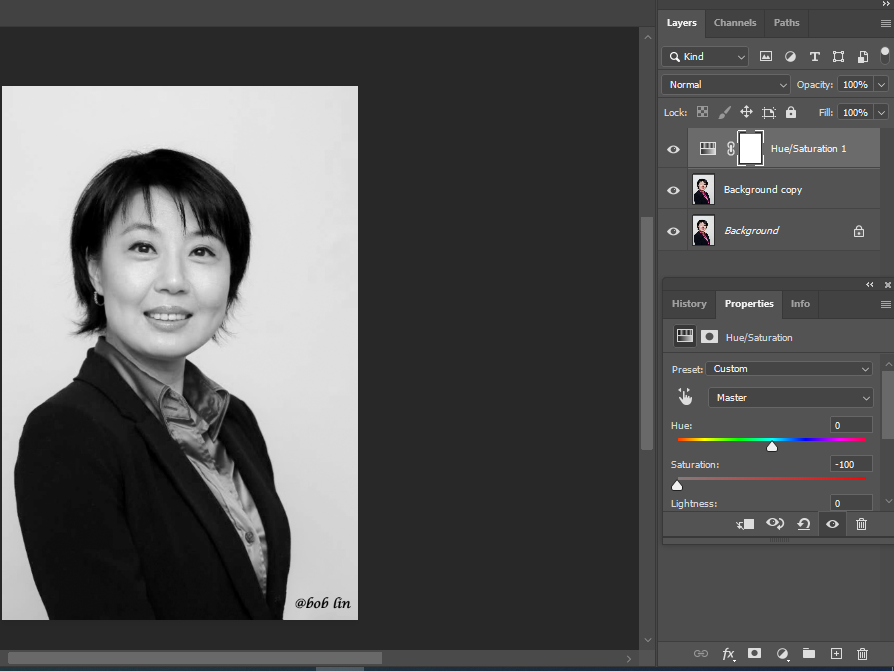
- Go to Hue/Saturation to create a new layer.
3. Adjust the Saturation to -100.
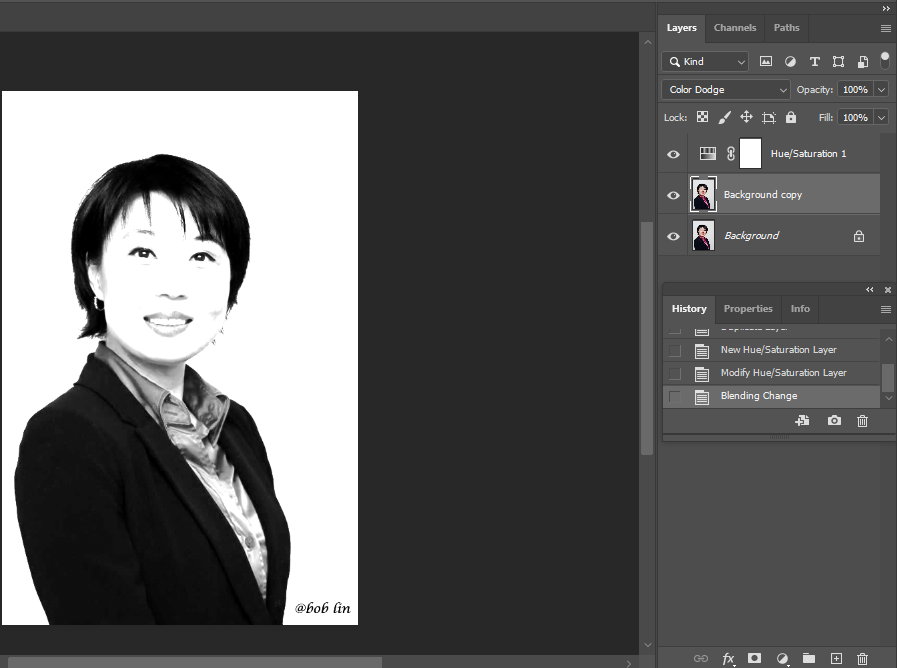
4. Highlight the original image, change the Blending mode to Color Dodge.
5. Hold Ctrl+I to inverse.
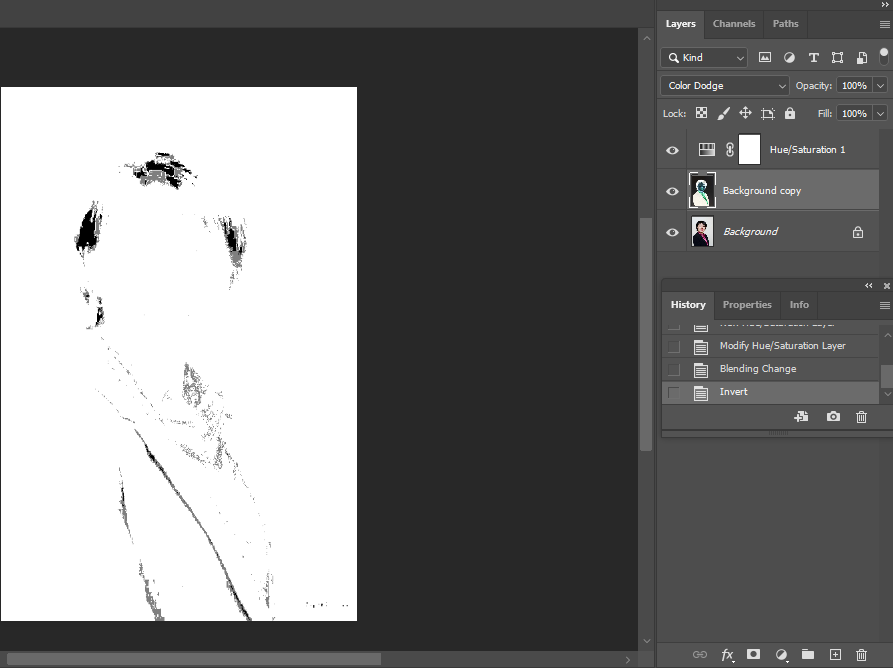
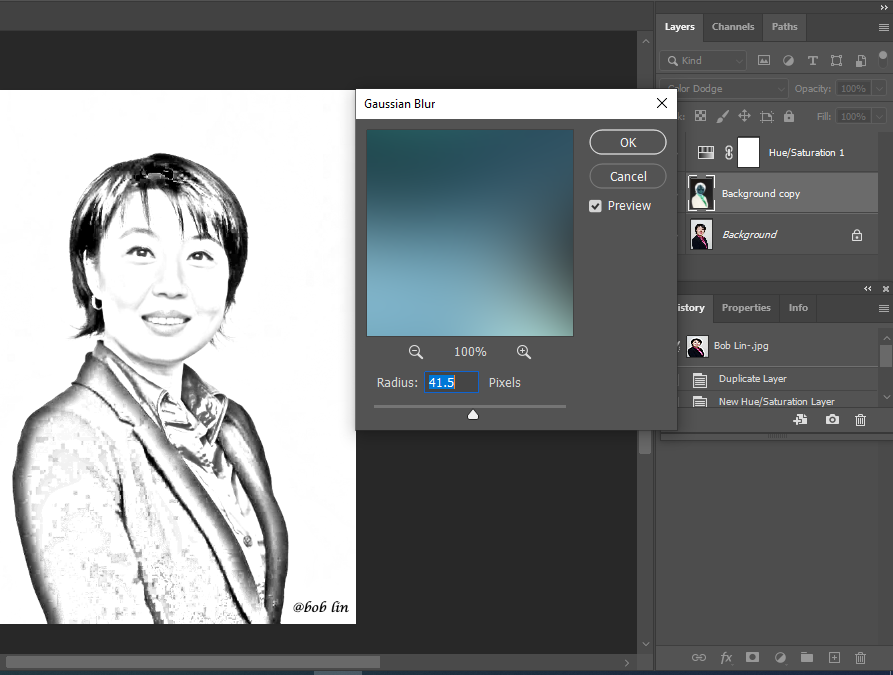
5. Go to Blur>Gaussian Blur and set Radius around 40.
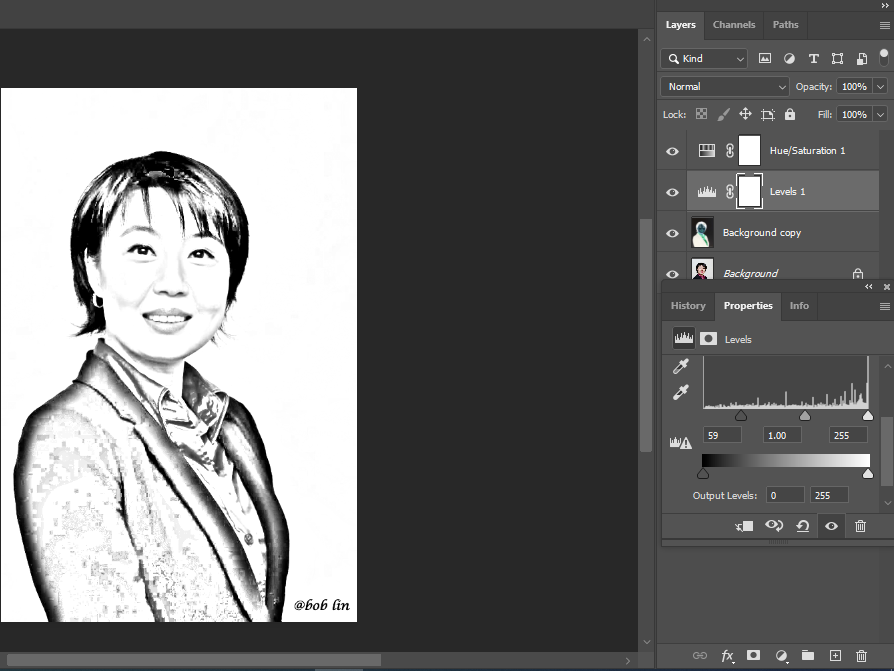
6. Create another Levels layer to adjust the white and black balance.
7. Now, add another layer and use the Brush tool to remove or add more black and white.