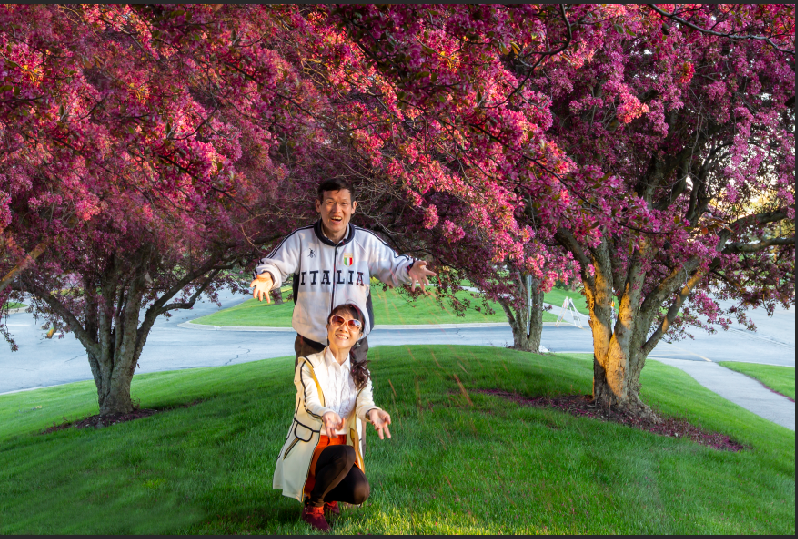
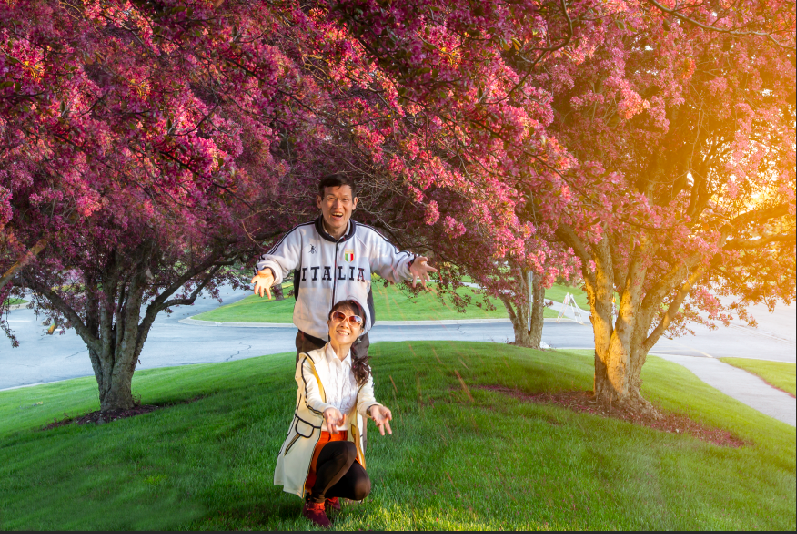
Before
![](http://www.quicksetupguide.com/blog/wp-content/uploads/2020/05/image-58.png)
After
![](http://www.quicksetupguide.com/blog/wp-content/uploads/2020/05/image-59.png)
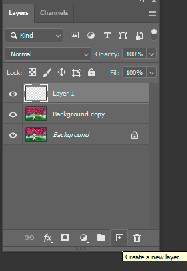
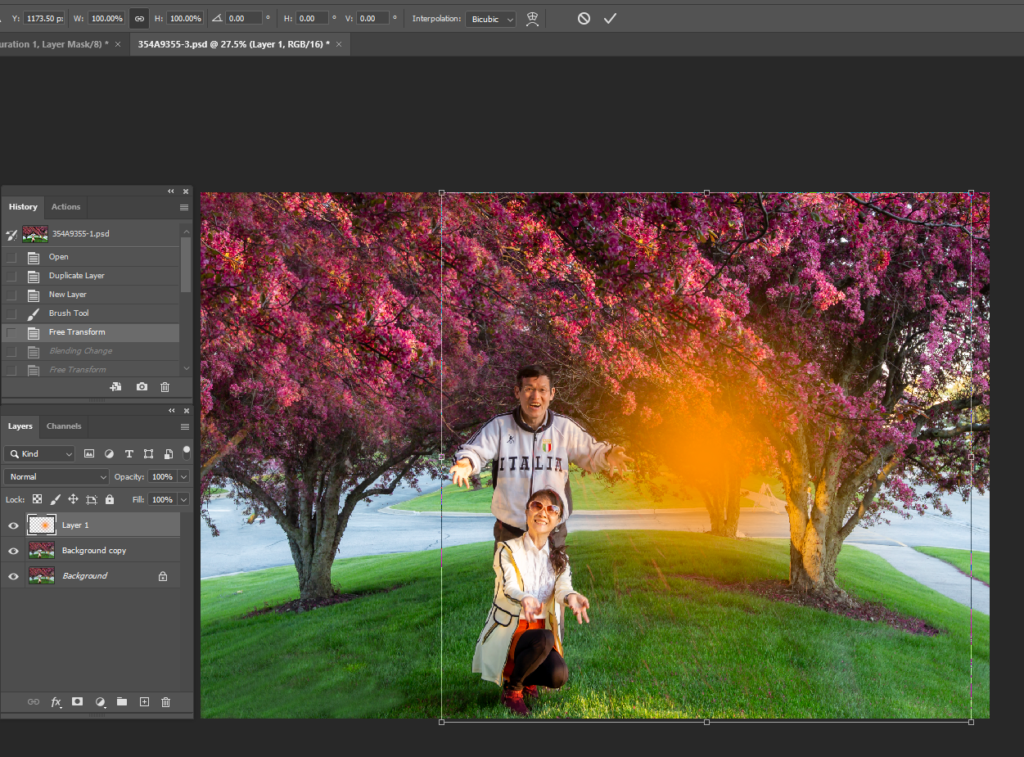
- Duplicate the image by going to Layer.
![](http://www.quicksetupguide.com/blog/wp-content/uploads/2020/05/image-60-1024x565.png)
2. Add a new Layer.
![](http://www.quicksetupguide.com/blog/wp-content/uploads/2020/05/image-61.png)
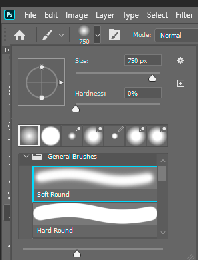
3. Select Brush Tool with orange color.
![](http://www.quicksetupguide.com/blog/wp-content/uploads/2020/05/image-62-1024x548.png)
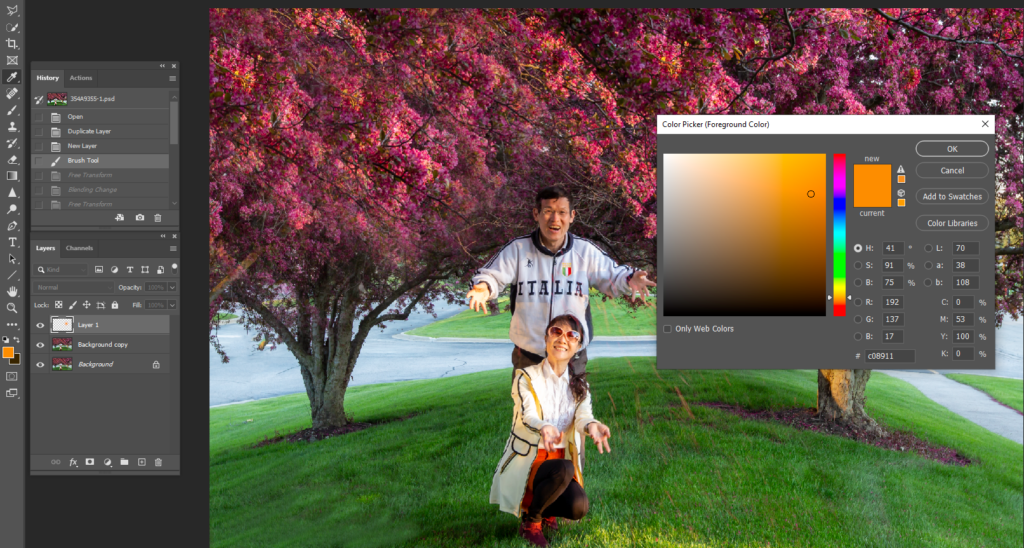
4. Make a large size, 0% Hardness.
![](http://www.quicksetupguide.com/blog/wp-content/uploads/2020/05/image-63.png)
5. Click the Brush in any place.
![](http://www.quicksetupguide.com/blog/wp-content/uploads/2020/05/image-64-1024x680.png)
6. Hold Ctrl+T to select the orange light area and adjust the size.
![](http://www.quicksetupguide.com/blog/wp-content/uploads/2020/05/image-65-1024x757.png)
7. Change the Blending mode to Screen and you cam also adjust the Opacity.
![](http://www.quicksetupguide.com/blog/wp-content/uploads/2020/05/image-66-1024x551.png)
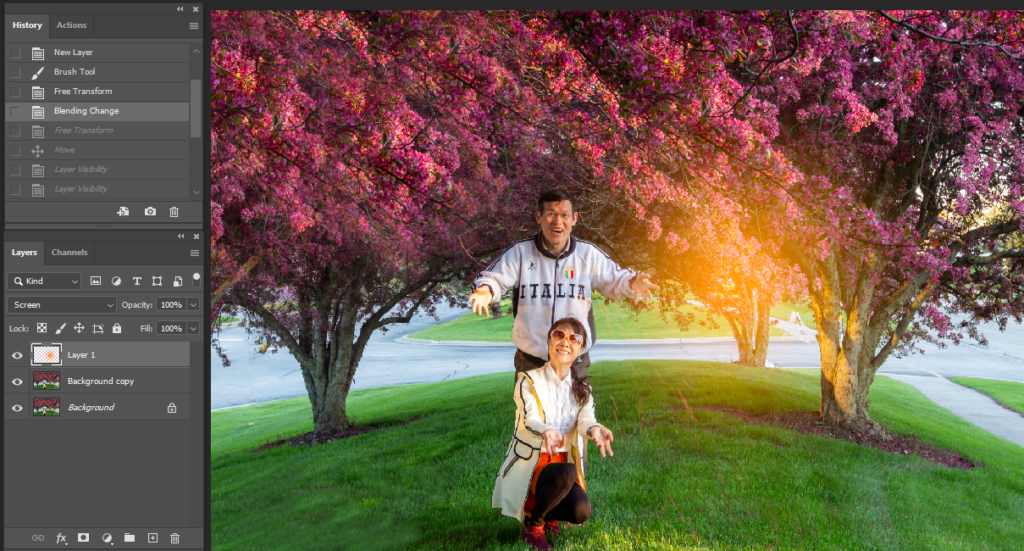
8. Use the Move Tool to move the sunset light to the place you want.
![](http://www.quicksetupguide.com/blog/wp-content/uploads/2020/05/image-59.png)
Please view the step by step video: