How to Use Sony Camera Bulb Mode with Fireworks as an Example

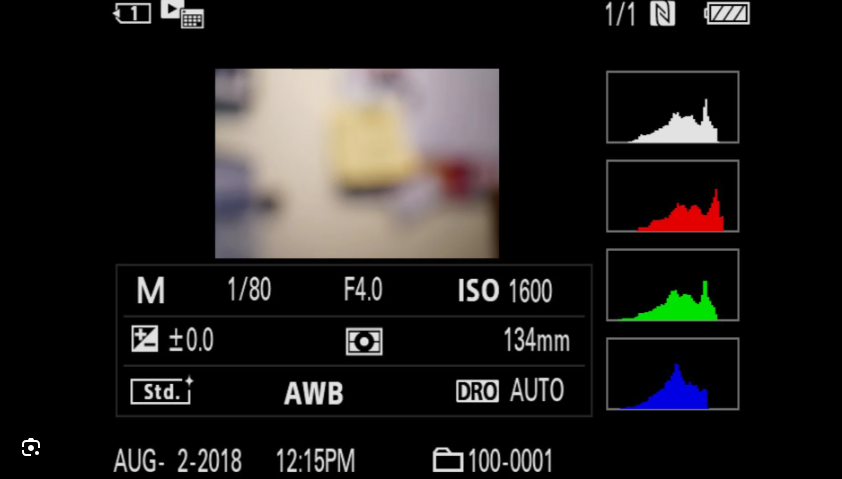
Using the Bulb mode on a Sony camera like the A1 allows you to take long exposure shots where you can manually control the duration the shutter remains open. This is particularly useful for night photography, light painting, star trails, and other creative long exposure effects. Here’s a step-by-step guide on how to use Bulb mode on the Sony A1:

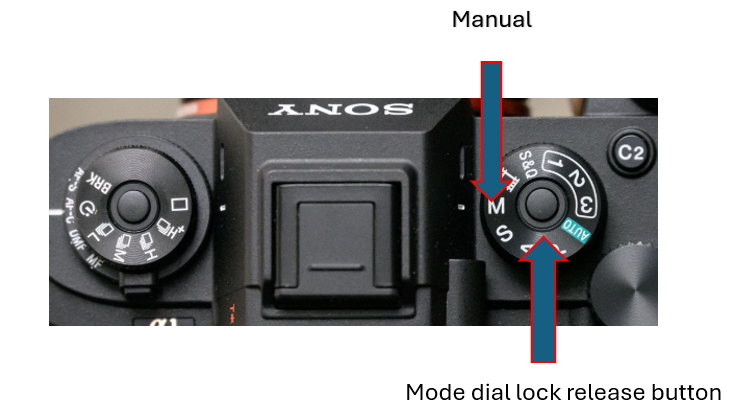
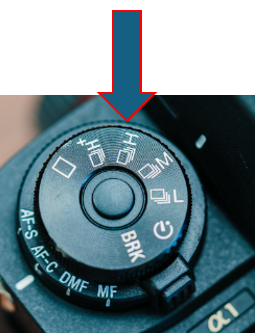
Step 1: Set the Mode Dial to Manual (M):

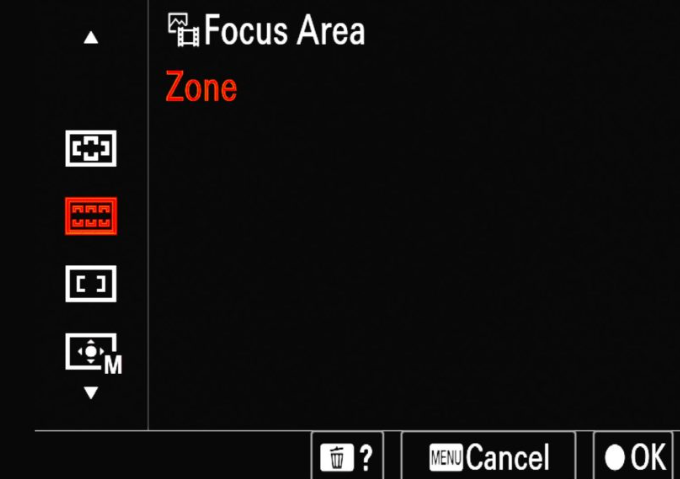
Rotate the mode dial on the top of the camera to “M” for Manual mode.

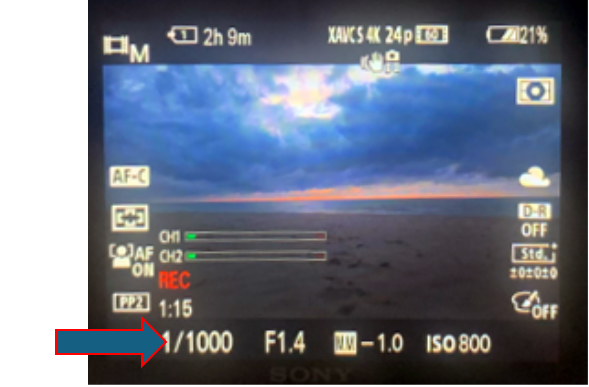
Step 2: Adjust the Shutter Speed:

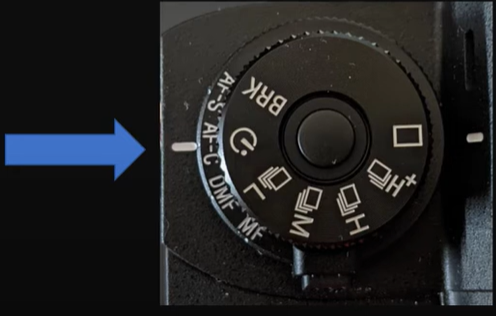
Use the control wheel to scroll through shutter speeds until you reach “BULB.” This setting is usually after the longest predefined shutter speed (e.g., 30 seconds).

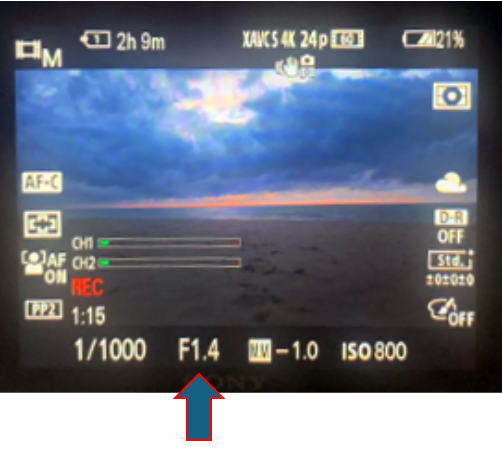
Step 3: Set the Aperture and ISO:

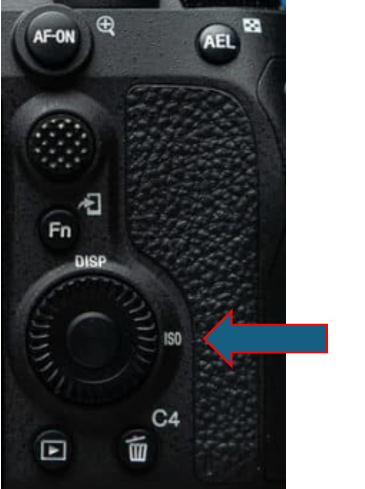
Adjust the aperture and ISO settings according to your desired exposure. A smaller aperture (higher f-number) and a lower ISO are generally recommended for long exposures to reduce noise.

Step 4: Use a Remote Shutter Release (Optional but Recommended):

To prevent camera shake, use a remote shutter release or the Sony Imaging Edge Mobile app. This allows you to start and stop the exposure without touching the camera.

If you don’t have a remote, you can use the self-timer function to reduce camera shake when pressing the shutter button.

Step 5: Compose Your Shot:

Frame your shot as desired. Using a tripod is essential for stability during long exposures.

Step 6: Start the Exposure:

Press and hold the shutter button (or press the remote shutter release button) to begin the exposure.

Keep the shutter button pressed for the duration you want the shutter to remain open. In Bulb mode, the shutter stays open as long as you hold the button down.

Step 7: End the Exposure:

Release the shutter button (or remote button) to close the shutter and end the exposure.

Practical Example: Capturing Firework Trails

Set up your camera on a tripod and compose your shot with the sky in view.

Switch to Manual mode and select Bulb for the shutter speed.

Set your aperture to around f/8 and ISO to 100-400, depending on ambient light conditions.

Focus manually on a distant light.

Use a remote shutter release or intervalometer to keep the shutter open for an extended period (e.g., 30 minutes to several hours).

Press the shutter release to start the exposure and lock it in place for the desired duration.

Release the shutter to end the exposure and review your image.

Practical Tips for Using Bulb Mode

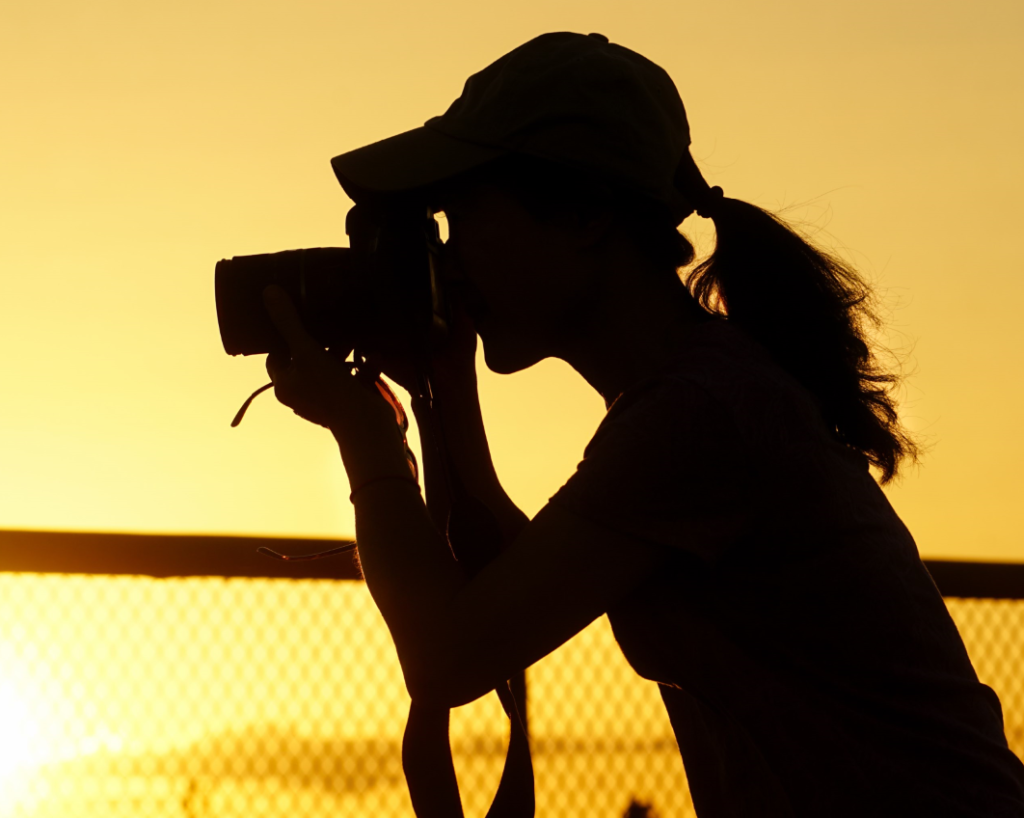
Use a Tripod: Stability is crucial for long exposures. A sturdy tripod will prevent any movement that can blur your image.

Manual Focus: Autofocus can struggle in low light. Switch to manual focus and focus on a distant light source or use the camera’s focus magnification feature to fine-tune the focus.

Test Shots: Take a few test shots to ensure you have the right settings for your desired effect. Adjust the aperture, ISO, and exposure time as needed.

Battery Life: Long exposures can drain the battery quickly. Make sure your battery is fully charged or carry a spare.

How to setup Sony a1 Tracking

Setting up tracking on the Sony A1 involves configuring the autofocus system to follow and maintain focus on a moving subject. Here’s a step-by-step guide to help you set up tracking effectively:

Setting Up Tracking on Sony A1

1. Accessing the Menu:

Press the “Menu” button on the camera to access the main menu.

2. Selecting AF/MF Settings:

Navigate to the “AF/MF” tab using the control wheel or joystick.

3. Choosing Autofocus Mode:

Select “AF-C” (Continuous AF) mode. This mode allows the camera to continuously adjust focus as the subject moves.

4. Selecting Tracking Autofocus:

Within the AF-C settings, look for “Tracking” or “Tracking AF”.

Enable tracking by selecting this option. This tells the camera to track and maintain focus on a subject as it moves across the frame.

5. Choosing Tracking Sensitivity:

Adjust the tracking sensitivity if needed. This setting controls how quickly the camera adjusts focus if the subject moves away from the selected focus point.

Higher sensitivity settings allow for quicker focus adjustments, which is useful for fast-moving subjects.

6. Selecting Focus Area:

Choose the appropriate focus area mode for tracking. Options typically include:

Wide Area: Covers a larger area of the frame for tracking.

Zone: Allows you to select a specific zone where the camera should prioritize focus.

Flexible Spot: Focuses on a smaller, flexible area within the frame.

7. Customizing Tracking Settings:

Depending on your shooting conditions and preferences, customize additional tracking settings such as:

AF Track Sens (Tracking sensitivity): Adjust how quickly the camera switches focus between subjects.

AF Track Duration (Tracking duration): Set how long the camera continues to track a subject after it disappears from view.

8. Assigning Custom Buttons (Optional):

For quick access, assign tracking features to custom buttons. This allows you to activate tracking or adjust settings without navigating through the menu.

9. Testing Tracking Performance:

Practice using the tracking feature in different shooting scenarios. This helps you familiarize yourself with how the camera tracks subjects and maintains focus.

10. Fine-Tuning and Practice:

Adjust settings based on your experience and feedback from testing. Every shooting situation may require slight adjustments to optimize tracking performance.

Tips for Optimizing Tracking:

Update Firmware: Ensure your Sony A1’s firmware is up to date to access the latest features and improvements, including autofocus enhancements.

Practice Regularly: Familiarize yourself with the camera’s tracking capabilities by practicing in various conditions, such as different lighting and subject speeds.

Review Results: After each session, review your images or footage to identify areas for improvement and adjust settings accordingly.

Troubleshooting Sony A1 Autofocus Problems

Welcome to our troubleshooting guide for the Sony A1. Today, we’ll walk you through common autofocus issues and how to resolve them.

Step 1: Check Autofocus Mode

First, ensure your camera is set to the correct autofocus mode. For stationary subjects, use AF-S (Single-shot AF). For moving subjects, use AF-C (Continuous AF).

Step 2: Verify Focus Area Settings

Next, check your focus area settings by going to Menu > Focus > Focus Area Fn key > Focus Area. Use Wide for general shooting, Zone to focus on a specific area, Center for focusing on the center, Flexible Spot for pinpoint focusing, and Tracking for following moving subjects.

Step 3: Adjust AF Tracking Sensitivity

If you’re using AF-C, adjust the AF Tracking Sensitivity. Set it to Responsive for quick refocusing or Locked on to maintain focus on a subject.

Step 4: Check Lens Compatibility and Firmware

Ensure your lens is compatible with the Sony A1 and that both your lens and camera firmware are up to date.

Step 5: Clean Lens and Camera Contacts

Clean the electrical contacts on the lens and camera body with a dry microfiber cloth to ensure a good connection.

Step 6: Evaluate Lighting Conditions

Autofocus can struggle in low light or low contrast scenes. Use additional lighting or focus on areas with higher contrast.

Step 7: Use Focus Assist

Enable focus assist functions like Focus Peaking or Focus Magnifier for manual fine-tuning of focus.

Step 8: Reset Camera Settings

If you’ve made a lot of customizations, consider resetting the camera settings to default.

Step 9: Test Different Lenses

If possible, test a different lens to determine if the issue is lens-specific.

Step 10: Disable SteadyShot Temporarily

Sometimes, image stabilization can interfere with autofocus. Try turning off SteadyShot to see if it helps.

Step 11: Environmental Factors

Make sure your camera and lens aren’t exposed to extreme temperatures or moisture, as this can affect autofocus performance.

Step 12: Review Focus Settings in Menu

  • Go through focus-related settings in the menu to ensure none are inadvertently causing issues. For example, check that AF with shutter is enabled if you want the camera to autofocus when pressing the shutter button.

Step 13: Check for Firmware Updates

  • Regularly check for firmware updates that may improve autofocus performance.

Step 14: Use AF-ON Button for Back-Button Focus

Consider using back-button focus by assigning autofocus to the AF-ON button for more control over when the camera focuses.

Conclusion We hope these tips help you troubleshoot autofocus problems with your Sony A1. If issues persist, contact Sony support or consult a professional.

Introduction of Medicare

As a retiree, understanding U.S. Medicare is very important. Today, let’s talk about U.S. Federal retirement health insurance, Medicare.

Categories of U.S. Medicare

U.S. Medicare plans are divided into parts A, B, C, D, G, K, F, L, M, N, etc.

  • Part A covers hospital expenses, skilled nursing facility care, hospice care, and some home health care. Most people do not have to pay a premium for Part A if they or their spouse paid Medicare taxes while working. Only those who neither they nor their spouse paid Medicare taxes need to pay a premium.
  • Part B covers primary physician services, outpatient care, medical supplies, and preventive services, including doctor visits and lab tests. The Part B premium in 2024 is $174.7 per month and may increase annually. Wealthier individuals may pay more.
  • Part C (Medicare Advantage) is also known as Medicare Advantage Plans, which will be elaborated later. Part C plans are health plans contracted out by Medicare to private insurance companies, providing the benefits of Parts A and B. Some Part C plans also include prescription drug coverage (Part D), dental insurance, and vision insurance. The premium for Part C includes the Part B premium and additional costs. Since services are provided by contractors, they are highly commercialized.
  • Part D includes prescription drug insurance. Part D is provided by insurance companies and private companies approved by Medicare. Premiums for Part D vary by individual, with higher earners paying more.
  • Parts G, K, F, L, M, N are all Medigap (Medicare Supplement Insurance) policies. Among them, Part G offers the most comprehensive coverage and is the most expensive. Part G covers coinsurance and hospital costs after Part A benefits are exhausted, Part B coinsurance or copayment costs, blood, and additional costs of Part A and Part B, as well as emergency expenses during foreign travel, up to $50,000. The cost of Part G depends on the insurance company, your age, and your location. Parts K, F, L, M, N provide less coverage than Part G but are cheaper. You can choose based on your own situation.

Advantages and Disadvantages of Medicare Advantage Plans and Medigap Plans

Part C, also known as Medicare Advantage Plans, is an alternative to traditional government Medicare and is becoming increasingly popular. It currently covers 30 million people, over half of all Medicare beneficiaries. Its selling point is that many Advantage Plans cover additional expenses not included in traditional Medicare, such as gym memberships, and limited dental and vision benefits. These plans are operated by private insurance companies that contract with the government to provide hospital, outpatient, and drug coverage, a combination of Medicare Parts A, B, and D.

Disadvantages of Advantage Plans:

  • Your doctor may not participate in the plan, whereas nearly all doctors accept traditional Medicare. In affluent areas, some doctors and specialists may choose not to accept government Medicare plans.
  • Generally, Advantage Plans are mostly HMOs, which have limited doctor and hospital networks. The network of doctors and hospitals in Advantage Plans is dynamic; a doctor in the network last year may not be this year.
  • Advantage Plans often require prior authorization before treatment, which can delay or even deny the treatment recommended by your doctor. Compared to traditional Medicare, Advantage Plans may also impose more restrictions on services like physical therapy.

Notably, the government pays $700 to sales agents for selling Advantage Plans as a transaction fee but only $55 for selling traditional Medicare. This is why Medicare sales agents often push Advantage Plans aggressively. Additionally, most Medicare sales agents do not purchase Advantage Plans themselves upon retirement.

In contrast, Plan G does not have these drawbacks. Purchasing Medigap insurance is not affected by pre-existing conditions. If you buy Advantage insurance first and then try to purchase Medigap insurance, pre-existing conditions might lead to rejection. Although each state has different regulations, this is a significant point. When a person is healthy, any insurance is fine. But if health issues arise, Advantage Plans might restrict your treatment. Transitioning back to traditional Medicare has annual windows and might result in rejection for supplemental insurance (Plan G or other Medigap insurance). The biggest drawback of Plan G is its cost.

In conclusion, choosing the right plan depends on your specific needs and health status. Careful evaluation of each option is necessary to ensure you get the best coverage.

美国退休医疗保险简介

作为退休老人,了解美国的退休医疗保险非常重要。
今天来聊一聊美国退休医疗保险,Medicare。
美国医疗保险分类。
美国的医疗保险计划分 A,B, C, D, G,K, F, L, M, N 等。

A部分 (Part A),承保住院费用,专业护理机构的护理,临终关怀和一些家庭医疗保健。大多数人只要他们自己或者配偶工作的时候交过医疗保险税不需要支付 A部分的费用。自有夫妻都没有交过医疗保险税的人才需要付保费。

B部分 (Part B),承保主要医生服务、门诊护理、医疗用品和预防服务。就是我们平时看医生和化验的医疗费用。
B部分的保额在2024年是 每个月 $174.7 一个月。每年都会有相对的增加。 富人可能要多付一些。

C部分 (Part C,Medicare Advantage)也叫 医疗保险优势, 也是我在后面需要展开讲的内容。
C部分是由 政府医疗计划(Medicare)承包给私营保险公司的健康计划。它提供 A 部分和 B部分的福利。有的 C 计划还提供 处方药 保险 (D 部分),牙医保险,眼睛保险。 C 部分保费包括 政府 B 部分费用和额外的一些费用。
因为是承包商提供服务,商业化比较重。

D部分 包括 处方药保险。
D部分由保险公司和政府保险 (Medicare)批准的私营公司提供。 D 部分的保费因人而异,收入高的多付。
G,K, F, L, M, N 部分 等都是 医疗保险缺口 (Medigap,Medicare Supplement Insurance)保险。其中 G 覆盖面最广,当然也最贵。
G部分承保Medicare 福利用完后的 A 部分共同保险 (Coinsurance)费用和住院费用,B 部分的共同保险部分费用和 共付费(Copayment), 血液,以及A 保险的其它费用,B保险的 其它费用,以及国外旅行的紧急情况费用,最多不超过五万美金。
G部分的费用跟保险公司,你的年龄,居住地相关。
K, F, L, M, N 部分 等 没有 G覆盖的多,但是也 便宜。 大家可以根据自己的情况做选择。

医疗保险中 C Plan与 Plan的优缺点。
C部分也叫 医疗保险优势计划,Advantage Plans。作为传统政府医疗保险的替代方案,优势计划现在越来越受欢迎。目前已经覆盖 3000 万人,约占 所有 Medicare 受益人的一半以上。它的卖点在于,许多优势计划覆盖传统医疗保险不涵盖的额外费用,譬如健身房会员资格,以及有限的牙科和视力福利。
该计划由私人保险公司运营,与政府签合同,提供医院、门诊和药物保险,就是 政府保险的 A, B 和 D的混合体。

优势计划的缺点: 你的医生可能不参与 这个计划,而几乎所有的医生都接受传统的医疗保险。当然,有的富裕地区的医生和专业医生会选择不接受政府医疗保险计划。
一般而言,优势计划基本都是 HMO,医生和医院网络都有限制。另外,优势计划的医生和医院网络是动态的,去年在里面的医生,今年可能不再在里面了。
优势计划经常在治疗之前需要得到预先授权,这可能导致医生建议的治疗被延误甚至被拒绝。与传统医疗保险计划(Medicare)相比,优势计划还可能对物理治疗等服务施加更多限制。

值得一提的是政府付 700 美元 给卖 优势计划的销售员作为交易费,只付55美元给卖传统医疗保险的销售员作为交易费。这就是为什么医疗保险推销员总是极力推销优势计划。另外大部分卖医疗保险的销售员退休时,自己都不购买优势保险。
以之相比,G计划没有上述缺点。购买补助医疗保险 (Medigap, 也叫 Supplement Plan) 不受以前的基础病影响。购买优势保险以后,再去买补助医疗保险,以前的基础病可能导致购买补助保险被拒绝。 虽然各个州的情况不一样,但是这是非常值得一提的事。一个人健康的时候,什么保险都没有问题,等身体出现问题的时候,优势保险计划限制你的治疗,再转回传统医疗保险每年有时间窗口,并且可能被拒绝补充保险 (G 或者其它 Medigap 保险)。G Plan 的最大缺点就是贵。
综上所述,选择合适的计划取决于你的具体需求和健康状况,仔细评估每个选项,才能确保你获得最好的覆盖。

Introduction of Medicare

As a retiree, understanding U.S. health insurance is very important. Today, let’s talk about U.S. retirement health insurance, Medicare.

Categories of U.S. Health Insurance

U.S. health insurance plans are divided into parts A, B, C, D, G, K, F, L, M, N, etc.

  • Part A covers hospital expenses, skilled nursing facility care, hospice care, and some home health care. Most people do not have to pay a premium for Part A if they or their spouse paid Medicare taxes while working. Only those who neither they nor their spouse paid Medicare taxes need to pay a premium.
  • Part B covers primary physician services, outpatient care, medical supplies, and preventive services, including doctor visits and lab tests. The Part B premium in 2024 is $174.7 per month and may increase annually. Wealthier individuals may pay more.
  • Part C (Medicare Advantage) is also known as Medicare Advantage Plans, which will be elaborated later. Part C plans are health plans contracted out by Medicare to private insurance companies, providing the benefits of Parts A and B. Some Part C plans also include prescription drug coverage (Part D), dental insurance, and vision insurance. The premium for Part C includes the Part B premium and additional costs. Since services are provided by contractors, they are highly commercialized.
  • Part D includes prescription drug insurance. Part D is provided by insurance companies and private companies approved by Medicare. Premiums for Part D vary by individual, with higher earners paying more.
  • Parts G, K, F, L, M, N are all Medigap (Medicare Supplement Insurance) policies. Among them, Part G offers the most comprehensive coverage and is the most expensive. Part G covers coinsurance and hospital costs after Part A benefits are exhausted, Part B coinsurance or copayment costs, blood, and additional costs of Part A and Part B, as well as emergency expenses during foreign travel, up to $50,000. The cost of Part G depends on the insurance company, your age, and your location. Parts K, F, L, M, N provide less coverage than Part G but are cheaper. You can choose based on your own situation.

Advantages and Disadvantages of Medicare Advantage Plans and Medigap Plans

Part C, also known as Medicare Advantage Plans, is an alternative to traditional government Medicare and is becoming increasingly popular. It currently covers 30 million people, over half of all Medicare beneficiaries. Its selling point is that many Advantage Plans cover additional expenses not included in traditional Medicare, such as gym memberships, and limited dental and vision benefits. These plans are operated by private insurance companies that contract with the government to provide hospital, outpatient, and drug coverage, a combination of Medicare Parts A, B, and D.

Disadvantages of Advantage Plans:

  • Your doctor may not participate in the plan, whereas nearly all doctors accept traditional Medicare. In affluent areas, some doctors and specialists may choose not to accept government Medicare plans.
  • Generally, Advantage Plans are mostly HMOs, which have limited doctor and hospital networks. The network of doctors and hospitals in Advantage Plans is dynamic; a doctor in the network last year may not be this year.
  • Advantage Plans often require prior authorization before treatment, which can delay or even deny the treatment recommended by your doctor. Compared to traditional Medicare, Advantage Plans may also impose more restrictions on services like physical therapy.

Notably, the government pays $700 to sales agents for selling Advantage Plans as a transaction fee but only $55 for selling traditional Medicare. This is why Medicare sales agents often push Advantage Plans aggressively. Additionally, most Medicare sales agents do not purchase Advantage Plans themselves upon retirement.

In contrast, Plan G does not have these drawbacks. Purchasing Medigap insurance is not affected by pre-existing conditions. If you buy Advantage insurance first and then try to purchase Medigap insurance, pre-existing conditions might lead to rejection. Although each state has different regulations, this is a significant point. When a person is healthy, any insurance is fine. But if health issues arise, Advantage Plans might restrict your treatment. Transitioning back to traditional Medicare has annual windows and might result in rejection for supplemental insurance (Plan G or other Medigap insurance). The biggest drawback of Plan G is its cost.

In conclusion, choosing the right plan depends on your specific needs and health status. Careful evaluation of each option is necessary to ensure you get the best coverage.

working while retired and how it impacts your income.

Today we’re diving into a topic that affects many retirees, working while retired and how it impacts your income.

Retirement doesn’t always mean the end of your working days.

Many choose to keep working, but how does this affect your income?

Let’s break it down.

If you’re under full retirement age, FRA, and still working, your Social Security benefits might be reduced.

In 2024, earning over $21,240 means $1.00 deducted for every $2.00 earned above that limit.

Once you reach your FRA, you can earn any amount without affecting your Social Security benefits.

Some pension plans may limit earning additional income while receiving benefits.

Check your specific plans terms withdrawing from retirement accounts like 401K.

S or IRAs while working can have tax implications.

Plan your withdrawals carefully to avoid unnecessary taxes.

Extra income from working can push you into a higher tax bracket and affect the taxation of your Social Security or pension income.

Retirement income can be complex.

Consult with a financial advisor to understand your situation and make the best financial decisions.

Thanks for watching if you found this video helpful.

Please like and subscribe for more tips on managing your retirement.

如何拍摄烟花

拍摄烟花既好玩有趣,只要掌握好一下几个要点就能帮助你拍摄出精彩烟花照片。

所需设备

  1. 相机:单反相机或无反相机是理想选择,但高质量的智能手机也可以使用。
  2. 三脚架:长时间曝光时保持相机稳定是必要的。
  3. 遥控快门释放:触发快门时有助于减少相机抖动。
  4. 镜头:通常建议使用具有手动对焦功能和24mm至70mm焦距的镜头。

相机设置

  1. 手动模式:这样你可以完全控制设置。
  2. ISO:从低ISO 100开始,避免噪点,ISO 400也可以。
  3. 光圈:使用中等光圈,如f/8,以确保清晰度。
  4. 快门速度:设置长时间曝光,起始值大约为2-4秒,以捕捉光的轨迹。根据烟花的亮度进行调整。

对焦

  1. 手动对焦:将焦距设置为无穷远(通常在镜头上标有∞符号),因为自动对焦在低光环境中可能会有困难。

构图

  1. 勘察地点:找一个可以清晰看到烟花发射的地方。
  2. 构图:考虑包括一些前景元素,如建筑物或人的剪影,以增加深度。

拍摄技巧

  1. 使用B门模式:这使你可以用遥控快门释放手动控制曝光。
  2. 时机:预测烟花爆发的时刻,并调整曝光时间以捕捉每次烟花的完整绽放。
  3. 尝试:拍摄多张不同曝光的照片,以确保捕捉到最佳时刻。

后期处理

  1. 回顾:定期检查你的照片,如有必要,调整设置。
  2. 编辑:使用如Adobe Lightroom等软件,拉黑暗部,微调亮度,颜色、对比度和清晰度。

额外提示

  1. 提前到达:提前占据一个好位置,并在天黑前设置好设备。
  2. 保持耐心:可能需要几次尝试才能拍到完美的照片,所以不要灰心。

Optimizing the Sony A1 for Sports and Action Photography: Step-by-Step Guide

1. Camera Settings

  • Mode Dial: Set the mode dial to Manual (M) for full control. Turn the mode dial to M while pressing the mode dial lock release button in the center of the mode dial
  • or Shutter Priority (S) to prioritize fast shutter speeds.
  • Shutter Speed: Set a high shutter speed, typically between 1/1000 and 1/4000 seconds, to freeze fast-moving subjects.

Select the desired shutter speed by turning the rear dial.

  • Aperture: Use a wide aperture (e.g., f/2.8 or f/1.4) to let in more light and create a shallow depth of field, isolating your subject from the background.

Select the desired aperture value by turning the front dial.

  • ISO: Set ISO to Auto but with a maximum limit (e.g., 3200) to ensure the camera can handle varying light conditions without introducing too much noise.

Select the desired ISO value by turning the Control Wheel.

Or press Function key.

2. Autofocus Settings

  • Focus Mode: Set to Continuous AF (AF-C) to maintain focus on moving subjects. Turn the focus mode dial to AF-C while pressing the focus mode dial lock release button.
  • Focus Area: Use Wide or Zone focus areas for broader coverage or Flexible Spot for precise focus points. Go to MENU → (Focus) → [Focus Area] → [ Focus Area Limit] → Add check marks to the focus areas that you want to use, and then select [OK].

Or press Function key.

Or press C2

Then, Select the desired Focus Area.

  • Tracking: Enable Real-time Tracking and Real-time Eye AF for enhanced subject tracking and focus accuracy.

Go to menu > Setup > Touch Operation, turn it on.

Aso, MENU → (Setup) → [Touch Operation] → [Touch Func. in Shooting] → [Touch Tracking].

You can also use the touch pad to select a subject for tracking when shooting with the viewfinder.

3. Drive Mode

  • Continuous Shooting: Set the drive mode to Hi+ (up to 30 frames per second) for maximum burst shooting. This ensures you capture every moment of the action.

4. Custom Buttons and Functions

  • Custom Buttons: Assign frequently used settings like Focus Area, Drive Mode, and ISO to custom buttons for quick access.

  • Back-Button Focus: Enable back-button focus to separate focusing from the shutter button, providing more control over focus during fast action.

5. Image Quality Settings

  • File Format: Use RAW for maximum flexibility in post-processing or RAW + JPEG if you need immediate JPEGs.

  • White Balance: Set to Auto or customize based on the lighting conditions.

6. Stabilization and Lens Choice

  • Image Stabilization: Enable in-body image stabilization (IBIS) to reduce camera shake, especially when panning. Go Menu > Shooting > Image Stabilization.

  • Lens: Use a fast, telephoto lens with a wide maximum aperture (e.g., 70-200mm f/2.8) for capturing distant action with good light-gathering capability.

7. Monitoring and Reviewing

  • EVF and LCD: Use the electronic viewfinder (EVF) for real-time feedback and the LCD screen for quick review of images.

  • Histogram and Exposure: Monitor the histogram to ensure proper exposure, avoiding blown highlights or underexposed areas.

8. Battery and Memory Management

  • Extra Batteries: Carry extra batteries as continuous shooting and high-speed operations can drain the battery quickly.

  • High-Speed Memory Cards: Use fast memory cards (UHS-II) to handle the high data rate of continuous shooting.

9. Practice and Experimentation

  • Familiarity: Practice with your camera settings in different sports scenarios to become familiar with the best settings for various conditions.
  • Experiment: Don’t be afraid to experiment with different settings to see what works best for the specific action you are capturing.

10. Post-Processing

  • Software: Use software like Adobe Lightroom or Capture One to process RAW files, adjusting exposure, sharpness, and noise reduction.