Photograph the Milky Way: Where, When and How

Where are the best places to photograph Milky Way in Illinois?
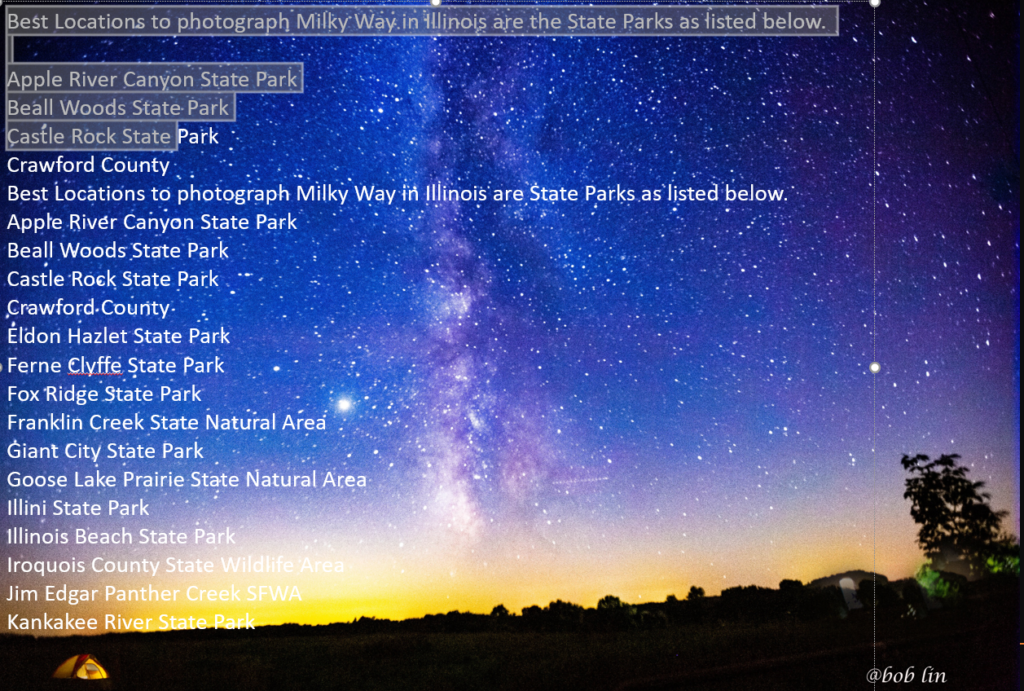
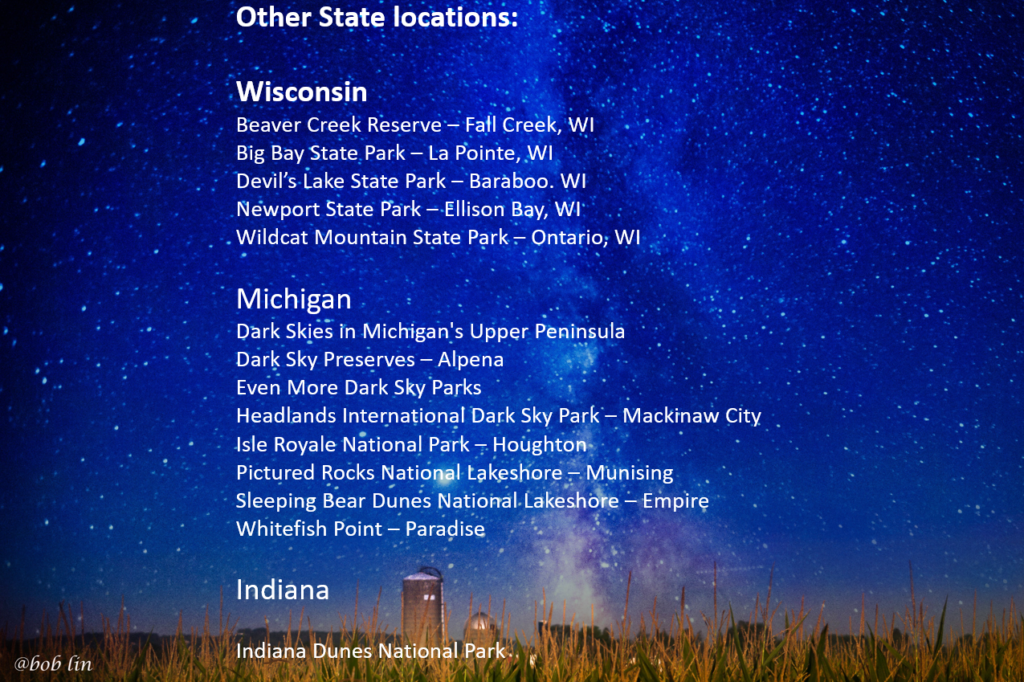
Where are the best places to photograph Milky Way in Wisconsin, Michigan and Indiana.
Foreground and composition consideration

Star or Sky app
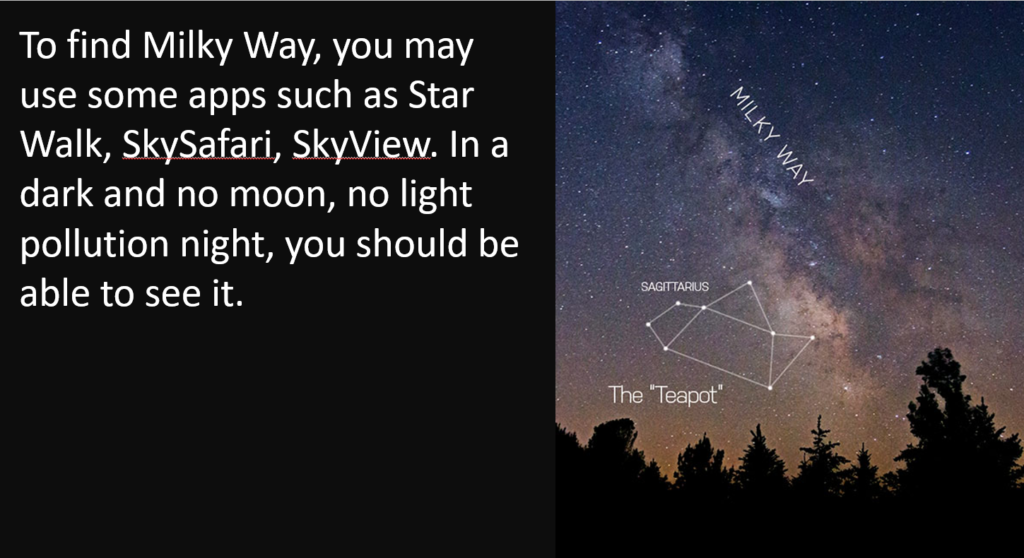
The Milky Way rises in the southeast, crosses the southern horizon, and then sets in the southwest

When is Milky Way Season and what time to shot?
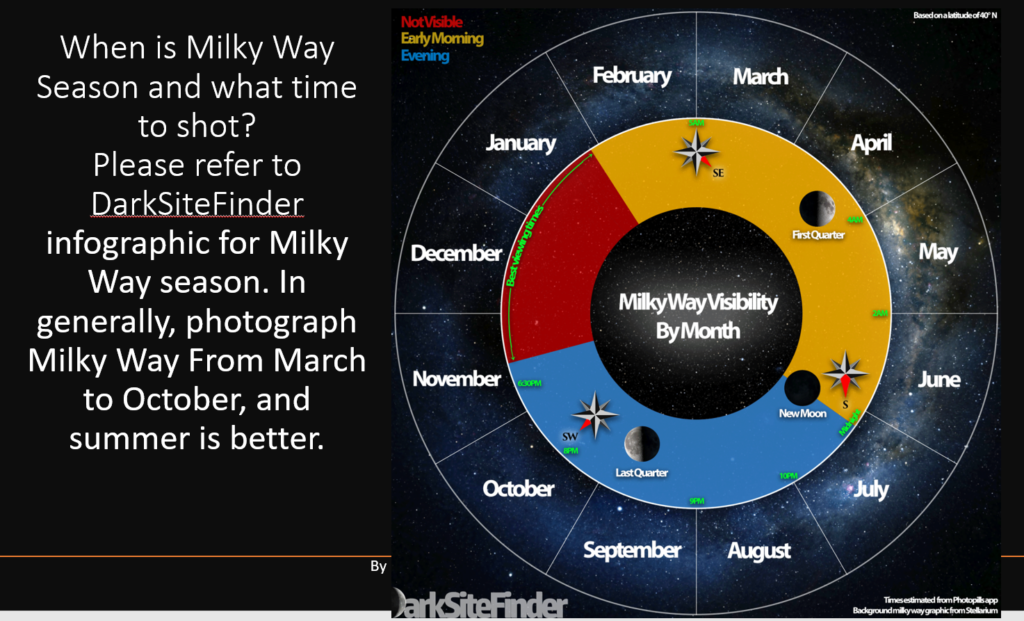
The best time to photograph the Milky Way is one hour after sunset or before sunrise without moon.
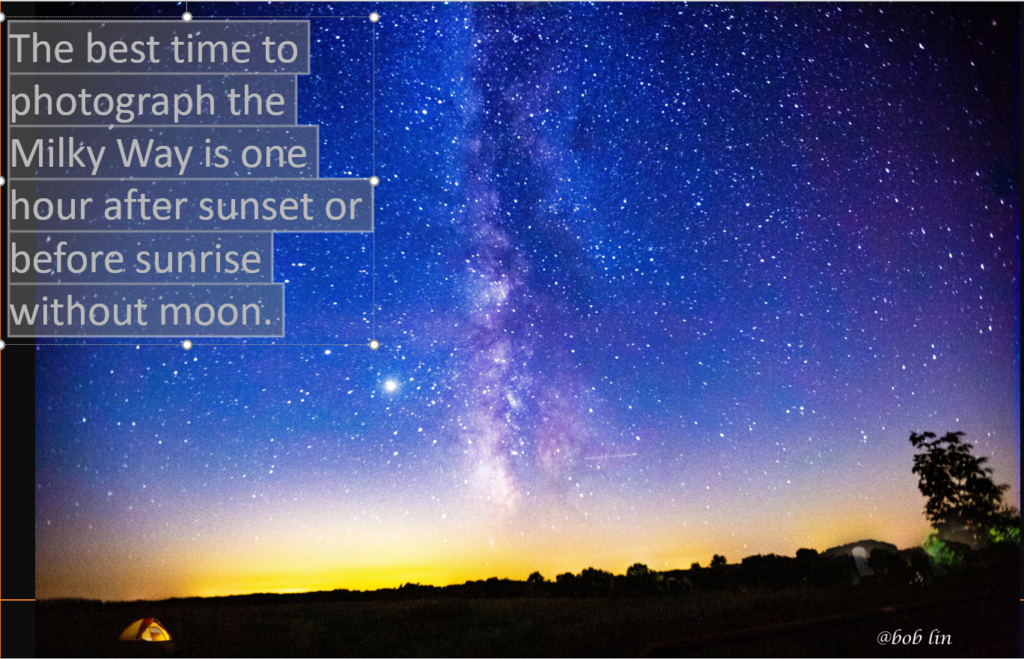
Can I see the Milky way without especial equipment. yes, you can!
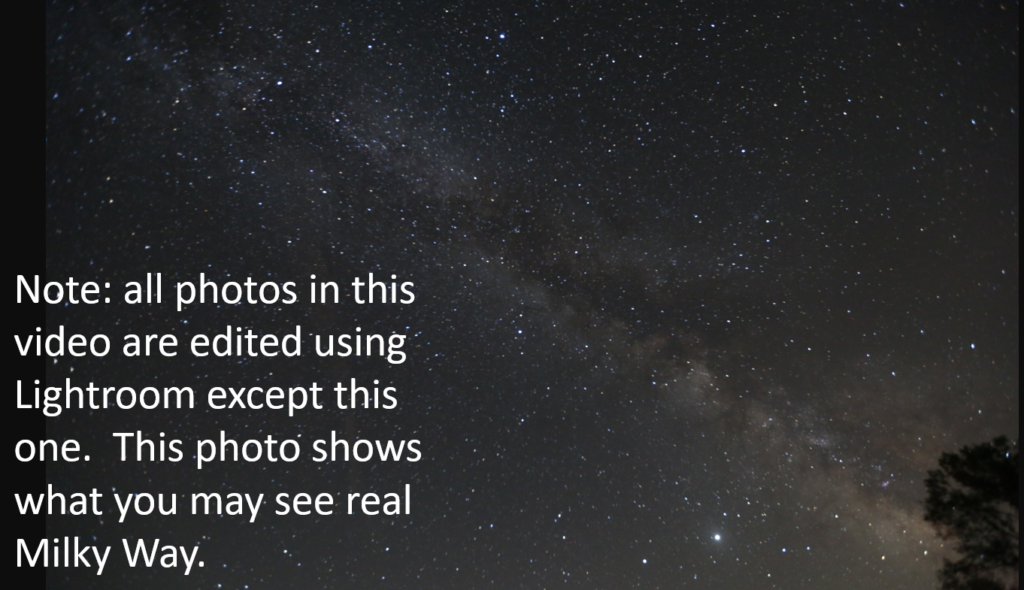
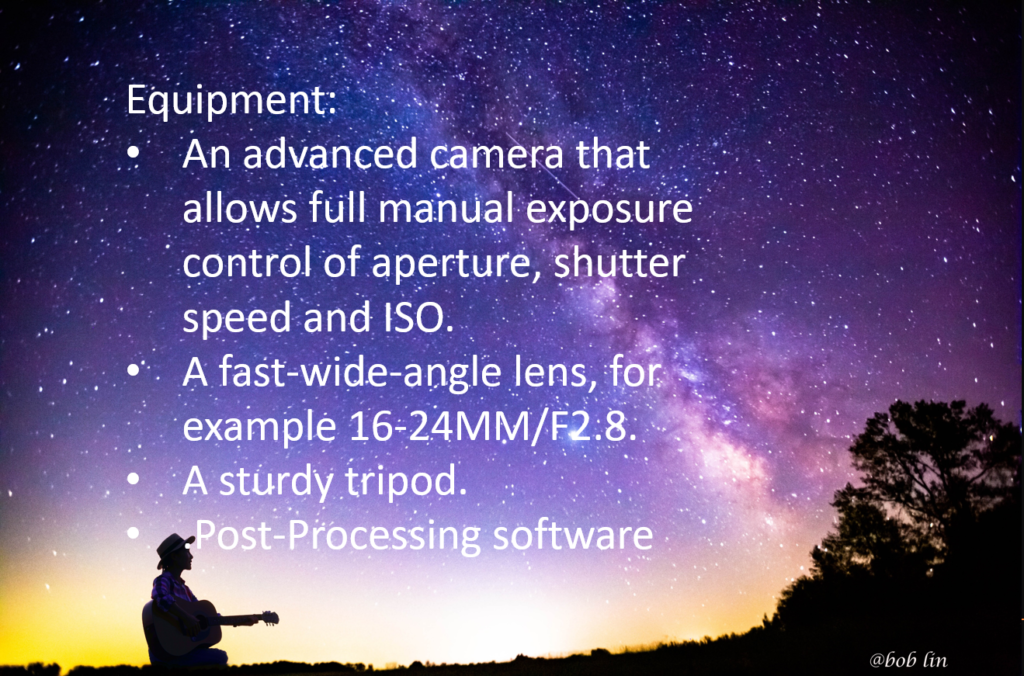
How to photograph Milky Way?
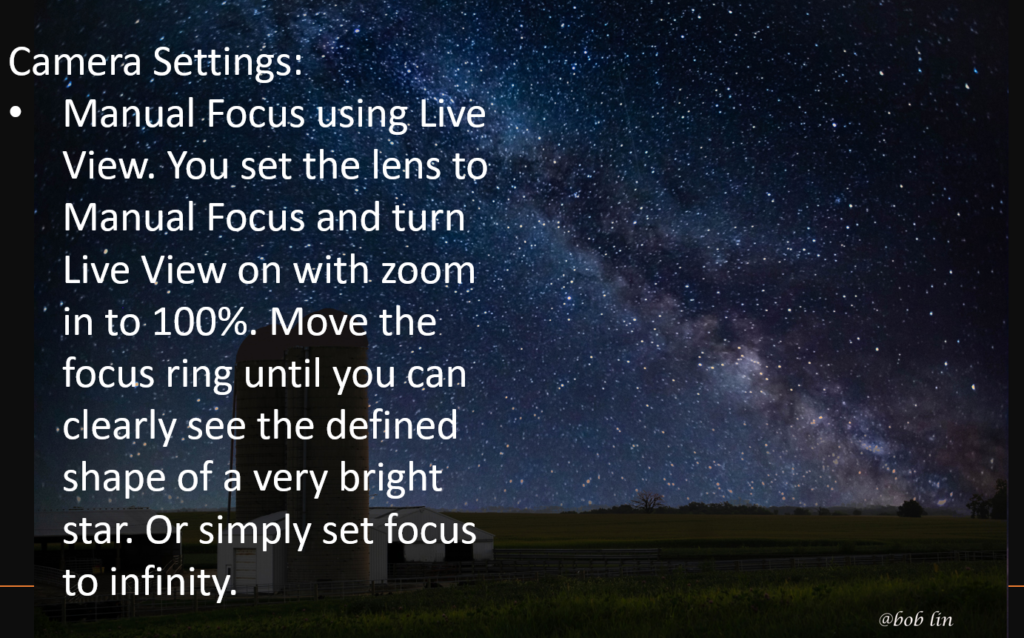
Camera Settings:
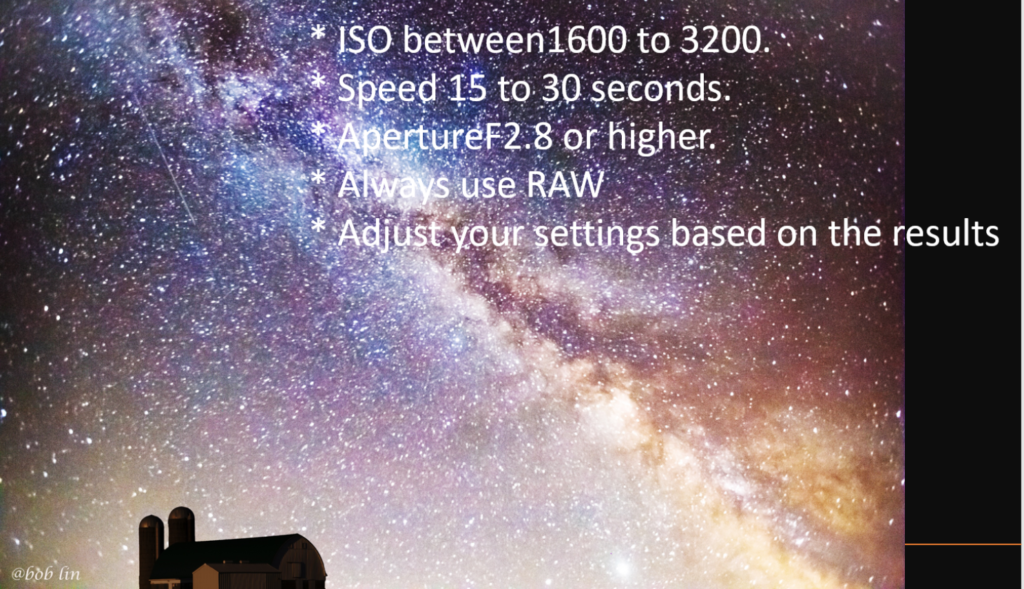
Use the 500 rule to set your shutter speed. 500 rule is 500 divided by the focal length of the lens. Here are some examples:

500 ÷ 14mm on a full frame sensor = 35 seconds

500 ÷ 24mm = 20 seconds

500 ÷ 18mm ÷ 1.6 for a Canon crop sensor = 17 seconds

500 ÷ 50mm ÷ 2 for a mirrorless sensor = 5 seconds

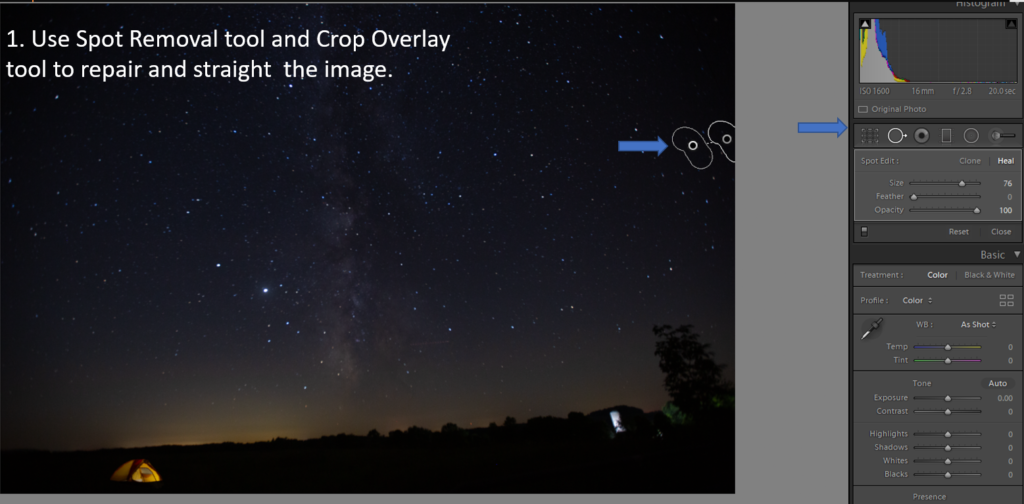
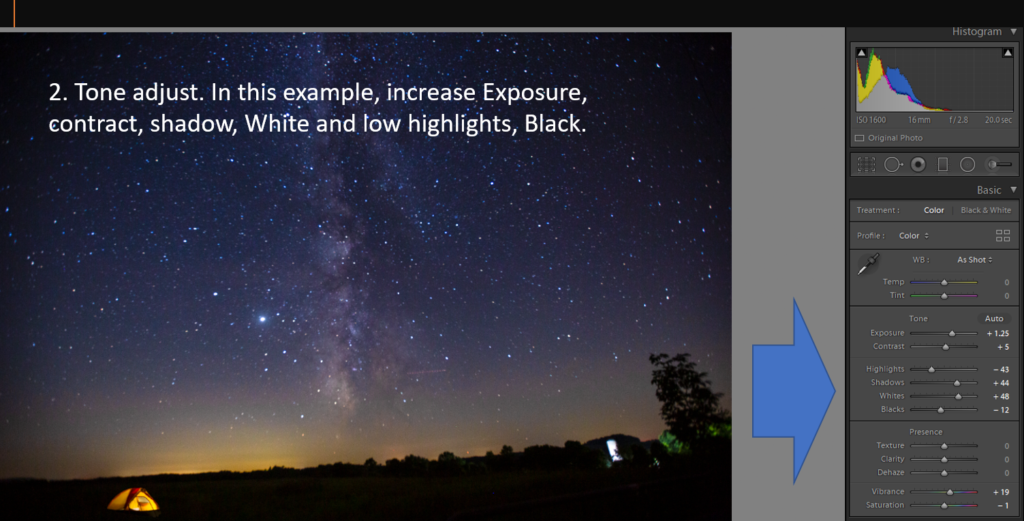
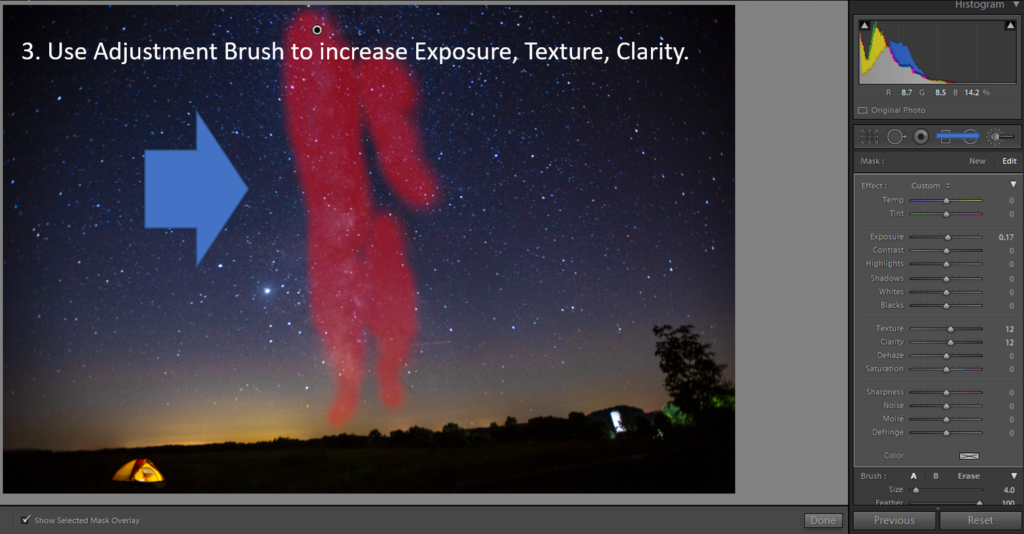
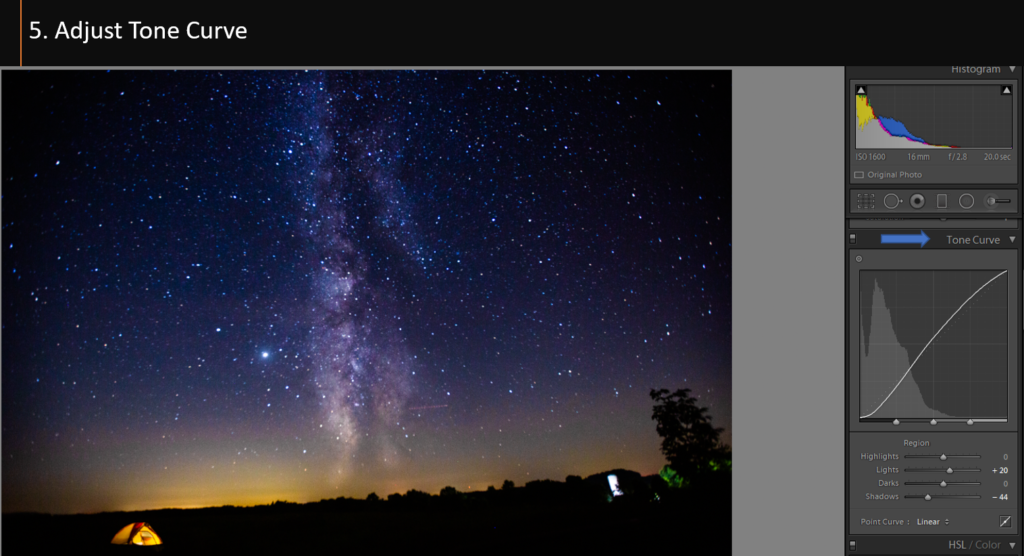
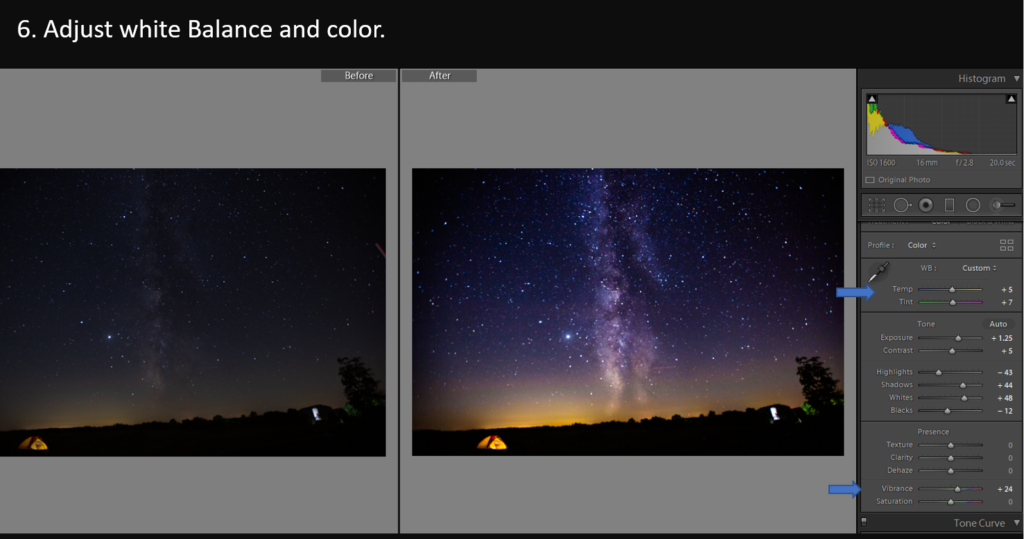
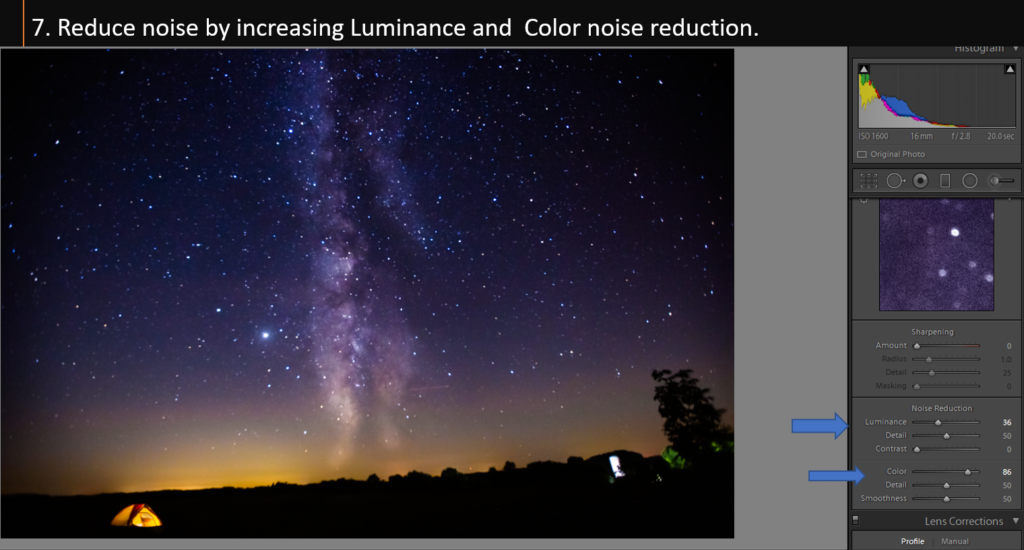
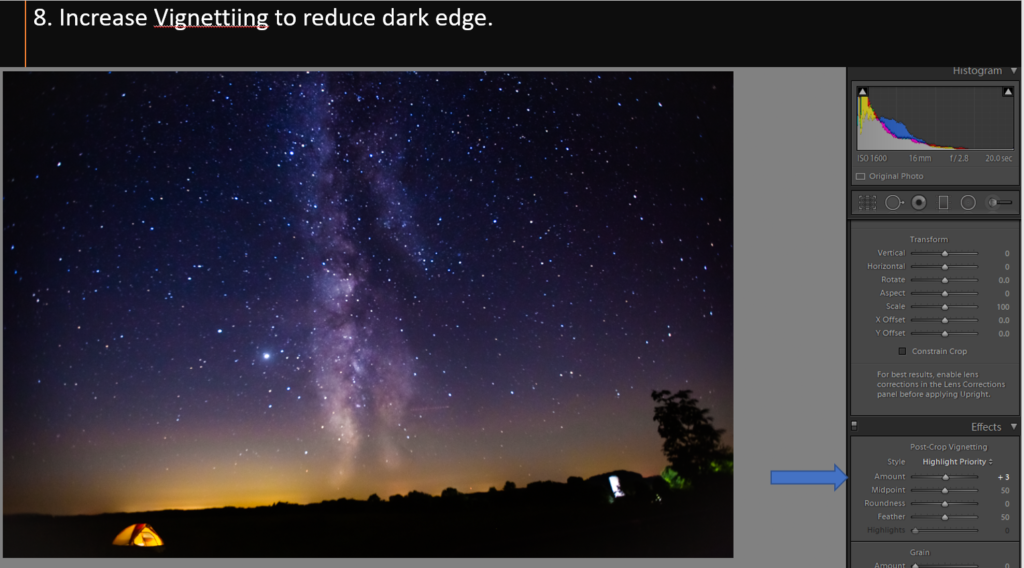
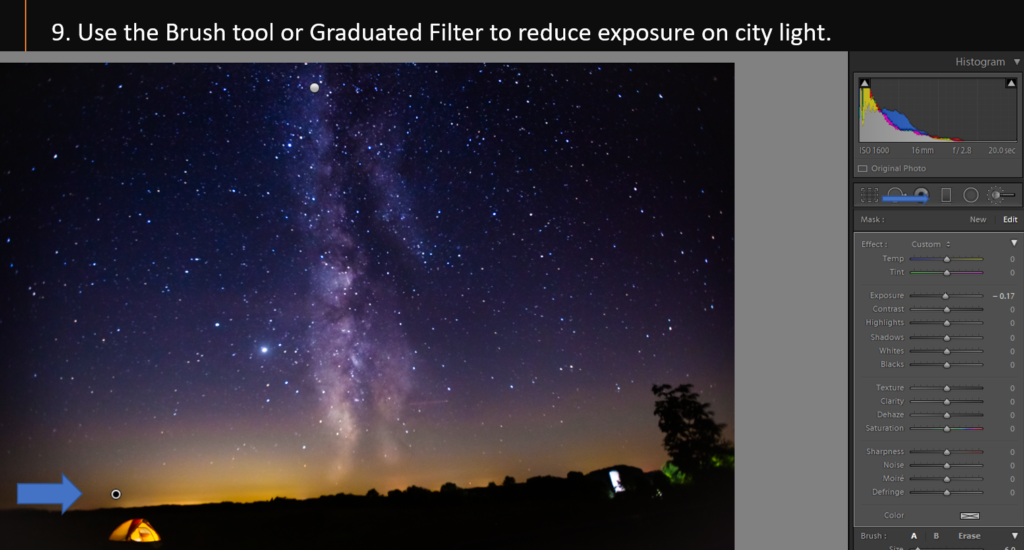
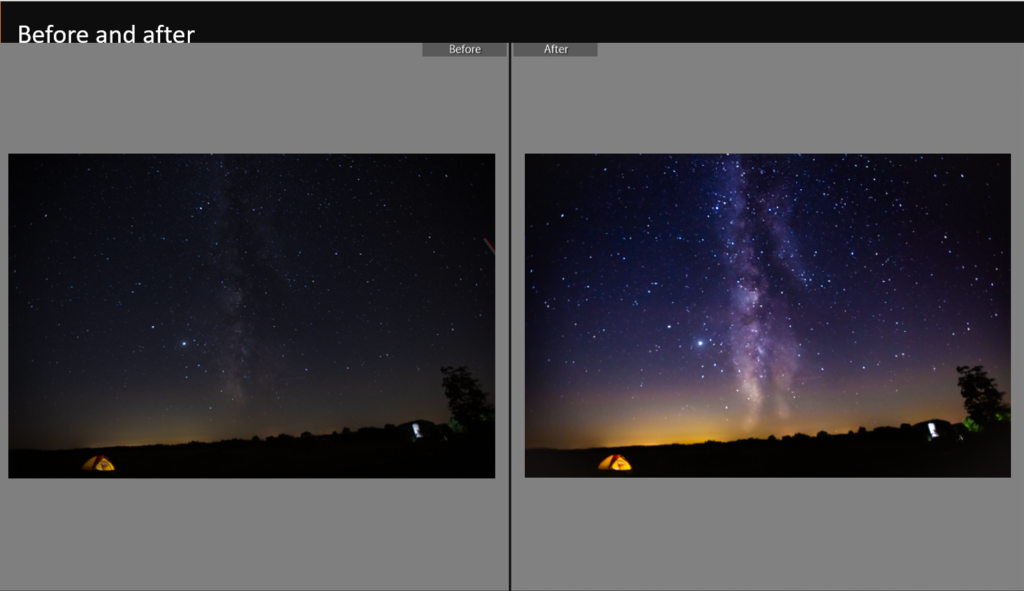
Post-Processing

Please this step by step video:

How to create and add photos Albums in Amazon Photo

With Amazon Prime, you can have unlimited photo storage. This video show how to create a album and add photos into the album.
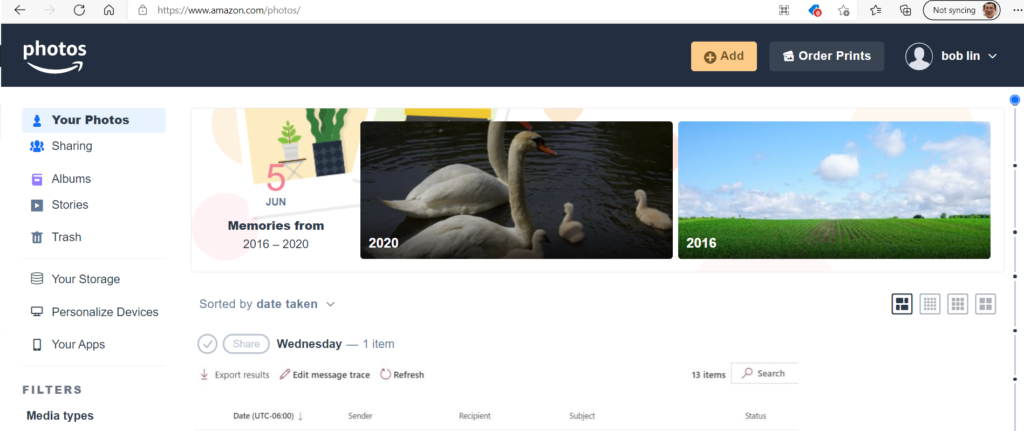
  1. Login your Amazon account and go to photo page or
    Amazon Photos

2. Click Albums on the left.

3. Click Create albums.

4. Type the Albums name, 2020 in our example, then Save
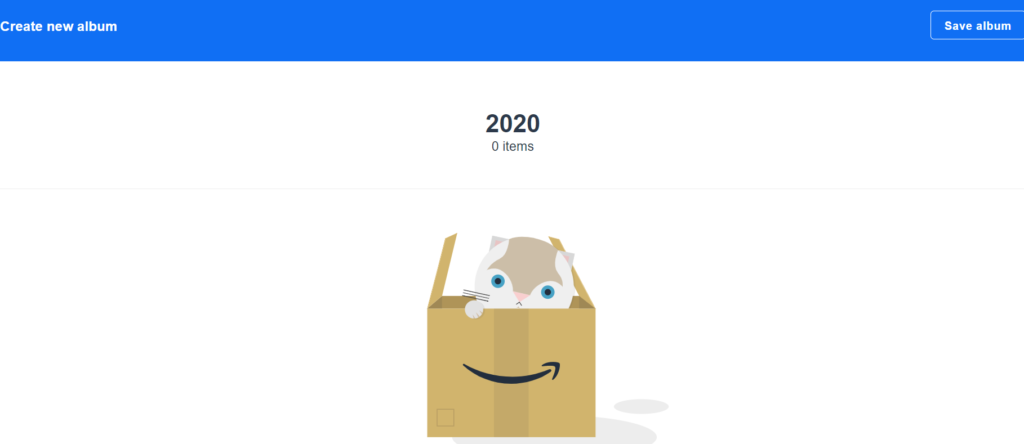
5. Click Add photos.

6. Select the photos you want to add. In our example, we sorted by date taken and high light all 2020 photos. Click Add to album.
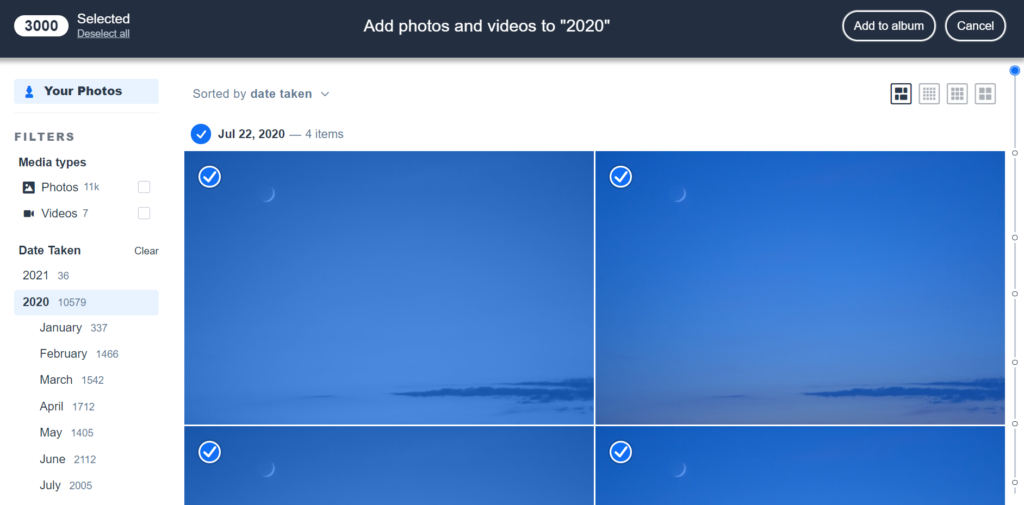
7. It starts to adding photos to the album.

8. Now, you added all 2020 photos into the album.

Please view this step by step video:

Do we need to report 529 Plan Withdrawals on Tax Return?

  • Withdrawals from 529 plans are not taxed at the federal and state level as long as you follow all the rules for qualifying expenses. When the 529 plan funds are used to pay for qualified education expenses, you should receive Form 1099-Q and Form 1098-T which will list the amount of the 529 plan distribution and how much was used to pay for college tuition and fees. You’ll have to report these form to the IRS.

529 vs Coverdell ESA

Both 529 plans and Coverdell Education Savings Account (ESA) are college saving plans with tax benefits. They can be used to help pay for education costs. However, there are a few important distinctions such as contribution amounts, contribution restrictions, and investment options.

  • Contribution amounts. Unlike a 529 plan where a donor can contribute up to the gift tax exemption amount without having to file tax paperwork ($10,000 in 2021 for an individual and $20,000 for a married couple in Illinois), a Coverdell ESA limits the total amount contributed for any one beneficiary to $2,000 per year.
  • Contribution restrictions. With a 529 plan, there are no income level restrictions for contributions while a Coverdell ESA, if your adjusted gross income exceeds $110,000 for an individual, or $220,000 for a married couple filing a joint return, you’re not eligible to use a Coverdell at all.
  • Investment flexibility.  With a Coverdell ESA, you can pick specific investments you like while a 529 plan is limited to the investments that the state-sponsored plan offers.
  • Tuition vs Expenses.  A 529 plan, when used for elementary and secondary schools only, is limited to tuition, while a Coverdell ESA can pay for elementary or secondary school tuition and expenses as well.
  • Tax Benefits. Both 529 savings plans and Coverdell ESAs are after-tax­ accounts. However, for a 529 plan, many states do offer a current-year state tax deduction for contributions.

What’s Free Application for Federal Student Aid (FAFSA)?

Free Application for Federal Student Aid (FAFSA) is the
low-interest loans U.S. Department of Education offers to eligible students for covering the cost of college or career school. FAFSA provides eligible students at participating schools Direct Subsidized Loans and Direct Unsubsidized Loans.

免费申请联邦学生援助(FAFSA)是 美国教育部向符合条件的学生提供低息贷款,以支付大学或职业学校的费用。 FAFSA向在校的合格学生提供两种贷款,直接补贴贷款和直接无补贴贷款。

Direct Subsidized Loans are available to undergraduate students with financial need while Direct Unsubsidized Loans are available to undergraduate and graduate students; there is no requirement to demonstrate financial need. In general, Direct Subsidized Loans have slightly better terms to help out students with financial need because the U.S. Department of Education pays the interest on a Direct Subsidized Loan for the first six months after you leave school.


有经济需求的大学生 可申请直接资助的贷款,而 无需证明有财务需要 的大学生和研究生 可以申请直接无补贴贷款。 通常,直接补贴贷款的条件比
直接无补贴贷款更优惠,比如美国教育部会在您离开学校后的六个月内才要求支付直接补贴贷款的利息。

The interest rates for Direct Subsidized Loans and Direct Unsubsidized Loans first disbursed on or after July 1, 2021 and before July 1, 2022 are shown in the chart below.

The US Government also offer Parent PLUS Loan which is a federal, non-need-based loan that is borrowed by a parent for a dependent student. Loan repayment begins 60 days following the full disbursement of the loan.

Undergraduate BorrowersGraduate or Professional Borrowers
3.73%5.28%
Direct Subsidized Loans and Direct Unsubsidized LoansDirect Unsubsidized Loans

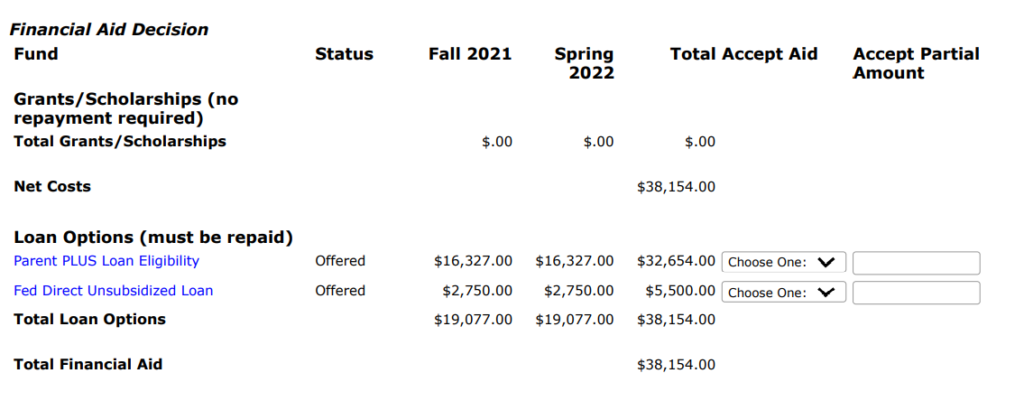
This is an example of FAFSA loan.

Photoshop: Could not complete your request because there isn’t enough room to dock it on this monitor

Situation: When open an image, you may receive this error: Could not complete your request because there isn’t enough room to dock it on this monitor.

Troubleshooting: 1. Close all tools and then try it.

2. Close Photoshop and re-open it without image. Go to
Photoshop preferences, Reset Preference.

3. Add more RAM to the computer.

4. I get this error if the PS window is maximized. If I open anything with PS not maximized then it will open.

5. You have moved Options Bar to other location that is causing the same bug. Another example, if you have two monitor keep all things in the same monitor.
Photoshop CC prefers to be on my main screen

6.

How to take a screenshot on iPhone

Taking a screenshot on iPhone may be different on different models. This video show you how to do so.

  1. iPhone models with Face ID

* Press the right-side button and the volume up button at the same time.

2. iPhone models with Home and Side button

* Press the right-side button and the Home button at the same time.

3. iPhone models with Home and Top button

* Press the Top button and the Home button at the same time.

After taking a screenshot, you will see a thumbnail temporarily appears in the lower-left corner of your screen. Tap the thumbnail to open it.

Tap upload icon to share with other apps.

Tap Done to save the screenshot to photos or Files.

Please view this step b ystep:

Enable and Troubleshoot Trusted Places on Android Device

Trusted places is an option of Smart Lock, which allows you to unlock your Android device when you are in a specified location. This article shows how to enable Trusted Places and troubleshoot possible issues.

  • To enable Trusted places, tap Settings icon
  • In the Settings, tap Security.
  • Tap Smart Lock
  • In Smart Lock, tap Trusted places
  • Tap Add trusted place
  • Tap the location you want to add to the Smart Lock, Chicagotech.net – PC Mobile Service in our example. 
  • Tap OK to confirm the selection

Now, you should have Chicagotech.net – PC Mobile Service as a trusted place and the device should keep unlock when you are in this place.

However, Trusted places may not work. Here are some resolutions:

Resolution 1: Make sure Location/GPS is enabled

Resolution 2: Make Sure Your Location Is Updated

Resolution 3: Turn on google Location Accuracy

Resolution 4: Disable Other Devices Under Google Location Reporting

Resolution 5: Make Sure Play Services Has Location Permission

Resolution 6: Accurate the location by choosing four corners

Resolution 7: Clear location history

Resolution 1: Make sure Location/GPS is enabled.

•Go to Settings>Location.

•Make sure the Use location is turn on.

Resolution 2: Make Sure Your Location Is Updated

•Go to Google Map

•Tap the compass that should update your location

Alternatively, tap your profit picture on the upper-right corner.

Tap Settings

Tap Home settings 3 dots.

Edit home location

Resolution 3: Turn on google Location Accuracy

•Go to Settings>Location

•Tap Advanced

Tap on google Location Accuracy

Make sure Google Location Accuracy is on

Resolution 4: Disable Other Devices Under Google Location Reporting

If you have another Android device, location data from the other device could be interfering with Trusted Places.

To fix this problem, go to Settings>Security>Location>Advanced

Tap Google Location History

Make sure only your current device is enabled

Resolution 5: Make Sure Play Services Has Location Permission

Go to Settings>Apps & notifications

Tap Google Play Services

Tap Permissions

Tap Location

Make sure the Location is on

Resolution 6: Accurate the location by choosing four corners

•Open the Google Map and zoom in as much as you can.

•Now carefully drop the first pin at the East end of your house. Repeat this process for North, South, and West end too.

This is more accurate location

Resolution 7: Clear location history

•On your Android device, open the Google Maps app Maps.

•Tap your profile picture or initial Account Circle and then Your Timeline

* Tap Manage settings

* Under Location settings, you have options to Delete all Location History, Delete Location History rang

Please view this step by step video:

How to mange Smart Watch

Most smart watches are managed by Phone. In this article, we use HalfSun Watch as example to manage Smart Watch on Android phone.

1. To manage the Smart Watch, we need to download and install a Bluetooth app such as H Band on your Phone.

2. In the Android Phone, go to Settings.

3. Tap on Connected Devices. Connect the HalfSun Device in our example.

Or Open H Band and make sure it is connecting Phone Bluetooth. 

4. In the Dashboard of the H Band, you have these information: steps and hours; Sport, Sleep, Heart rate, Blood pressure.

If you tap on Mine, you have My Device, Help, Goal settings and More such as Unit settings, Change theme, About us, and Third-party platform. You can also have an option to Log out here.

If you tap Android person icon,  You can set your Profile.

If you tap on the device icon, You have device information and settings such as Message notification, Alarm Settings, Sedentary setting, Heart rate alert, Turn wrist detection, pair device, BP private mode, screen-On time, Switch settingBrightness adjustment, Take photo, Countdown timer, Reset device password, Settings of main interface style, Firmware upgrade, Lear Data, Reset, and Disconnect. If you tap on Switch setting, You have these options: Wear detection, HR automatic monitoring, BP automatic monitoring, Find phone, Stopwatch feature, and Discount alert. 

If you tap on Sedentary setting, You can setup sedentary Start time, Stop time, and Reminder Interval.

On the Dashboard, if you tap More, you have 3 icons, Manual heart rate test.

Tap start icon to manual check the heart rate.  

Manual heart rate test will continue and shows the result.

If you tap on BP (Blood Pressure) test icon,  You can test blood pressure.

You have an option to save the result.

Finally, on the bottom of the Dashboard, you have an option to manage module.

You can enable or disable Sport, Sleep, Heart Rate and Blood pressure.

Please view this step by step video: