The following function is assigned to each button in the
default settings.
C1 (Custom 1) button: White Balance
C2 (Custom 2) button: Focus Settings
C3 (Custom 3) button: Focus Mode
C4 (Custom 4) button: Not set
Whta’s AF/MF/AEL button in Sony Camera
For shooting: AF/MF (Auto focus/manual focus) button switch between AF and MF. AEL button: lock exposure setting you choose.
For viewing: (Image index) button.
How to use Sony AE Lock (AEL) Feature
AE Lock lets you use the exposure setting you choose, and then lock that setting when you recompose. here is how.
- Place the focus point on your subject.
- Press and hold the AEL button to get a meter reading. A star will appear in the bottom right of your viewfinder or LCD, letting you know that the exposure has been locked. Continue to hold the AEL button.
- Recompose your shot, and then take the photo.
- Note: To take more than one photo without having to take another meter reading, just hold down the AEL button until you are done using the meter setting.
Troubleshooting Bluetooth problem on Android phone
How to reset Sony A7R Camera to its default settings?
You can reset the menu to the default factory settings. Just press Menu > Setup 6 > Setting Reset
How to select Focus modes in Sony A7R Camera
There are 3 focus modes to choose from in Sony A7R: autofocus, manual focus, and Direct Manual Focus (DMF). Autofocus focuses the lens for you, and manual focus puts you in full control. Direct Manual Focus is a hybrid of both: When you’re in this setting, press the shutter button halfway to engage the autofocus; once the camera grabs focus, you can then rotate the focusing ring on the lens to ensure accuracy.
If you are using autofocus, you can press AF/MF to switch from AF to MF.
How to Set the autofocus area and autofocus mode in Sony A7R Camera
- You can select autofocus area and autofocus mode using Fn (Function key).
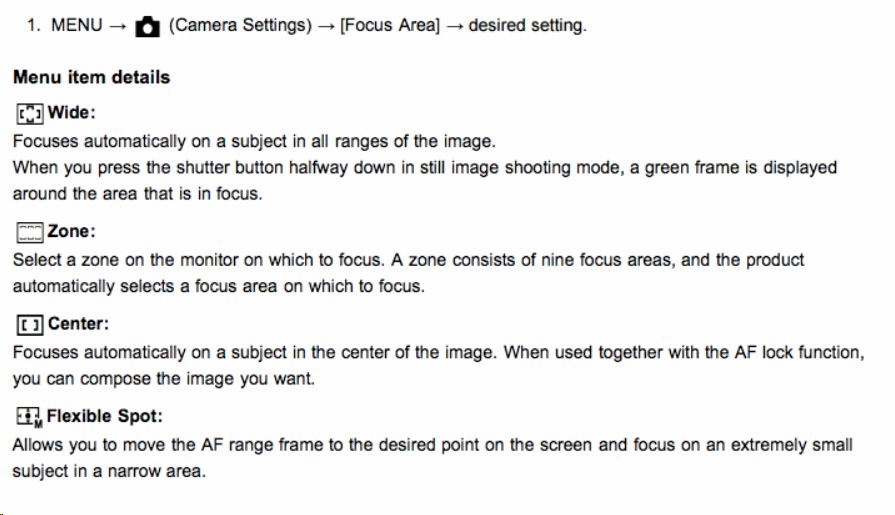
- Or you can go to Menu. For Focus Area, press Menu > Camera Settings 3 > Focus Area. For Focus mode, press Menu > Camera Settings 2 > Focus Mode
Note: When using Flexible Spot, you can press either side of the Control wheel you can choose between a small, medium, or large focus spot (for most situations medium works best). Press the Flexible Spot icon and you can choose the spot on which you want to focus (A). Press the top, bottom, or side of the Control wheel to move the spot to the center (if it is not there already). You can also rotate the Control wheel to toggle between a small, medium, and large focus point. Press the center of the Control wheel to lock in your selection.
In a case, the spot doesn’t move, press C2.
How to Set the ISO on Sony A7R camera
- If you know which ISO level you will use before taking shoot, press Function key to set it up.
- In the camera view, you can press the shutter release button halfway. Press the right side of the Control wheel on the back of the camera. Rotate the Control wheel to highlight the desired ISO (from ISO 100 to ISO 25600) (A). Press the middle of the Control wheel to lock in your selection and return to shooting.
How to Select Focus Area and Focus Mode Settings in Sony Camera


Camera Focus Area vs Focus Mode
Your Focusing Area is how your camera knows where in a scene to direct focus. It allows you to pick a certain area in your frame to use your focus points on.
A Focus Mode (not to be confused with Focus Area) changes the behavior of focus, such as whether a camera will reattempt focus every time a subject moves around or just lands on a designated area and locks focus despite the subject’s movement.